Difference between revisions of "Schematic"
| Line 1: | Line 1: | ||
==Features of the schematic tool in TARGET 3001!== | ==Features of the schematic tool in TARGET 3001!== | ||
| − | {| width=50% border=0 cellspacing= | + | |
| + | {| width=50% border=0 cellspacing=55 cellpadding=10 | ||
|- | |- | ||
| − | |[[Image:sch2.png]]||[[File:schematic.png|alt="Schematic"]]<br><br> | + | |[[Image:sch2.png]]||<span class="plainlinks">[[File:schematic.png|alt="Schematic"|link=http://www.target3001.de/target/video/english/miniproject/index.htm]]</span> <br><br> <span class="plainlinks">[[image:Miniproject_layout.jpg|link=http://www.target-3001.de/target/video/v16/e/miniproject.html]]</span> Video: Mini project |
|} | |} | ||
| − | |||
| − | |||
Revision as of 11:45, 12 June 2014
Features of the schematic tool in TARGET 3001!
 |
 Video: Mini project Video: Mini project
|
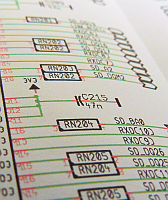
A schematic is a sketch of an electrical logic. It shows the electrical connections between component symbols by the use of signal wires and busses.
Characteristics of the schematic tool in TARGET 3001!:
- each 1.2m x 1.2m in size (equals 47.24 x 47.24 inches)
- up to 100 pages in one schematic
- extensive SQLite Component database containing over 40.000 symbols DIN/IEEE local on your computer
- free access to database updates within the same version number (internet connection required)
- easy component search and placement of symbols with automatic numbering
- symbols in the schematic can freely be edited at any time, independently from the database
- easy wiring by the use of a grid and "snap on"-function in schematic and layout
- Schematic router
- handle Signal classes
- handle Differential Pairs
- variants of assembly supported
- more than one schematic open at the same time - allows easy cut&paste between designs
- shift highlighted schematic elements to a different schematic page on button click
- star shaped signals in schematic possible
- bus-assistant for easy placement of similar signals
- move a schematic element to back- or foreground (in the context menu)
- currents in schematic can be displayed with values
- parts of a schematic or layout can be saved as a module
- easy reworking of a schematic: gate swap, pin swap
- renaming, renumbering as well as pin and gate swap automated in schematic and layout
- automatic electrical rule check
- connecting a signal to another in the schematic changes all the tracks in the PCB, too
- read in of netlists in OrCAD*-Multiwire and Mentor*-format, TARGET-ASCII and Gerber*-format
- individual creation of BoMs and netlists in Protel*, OrCAD* and Calay* format
- individual creation of Boms and netlists for your purchasing dept, for E-Test or assembling automats, with ordering numbers, prices or customized individual properties
- parts of the schematic can be copied for other jobs
- pSpice compatible simulation included
- your project documentations work in three languages
- Printing of the schematic by the print dialog in menu "File".
- images in schematic/layout possible
The meaning of "schematic" in TARGET 3001!
A schematic in TARGET 3001! can have up to 100 pages. A schematic can be transferred to a layout.
You reach the schematic mode in TARGET 3001! using the icon: ![]()
How to create a schematic in TARGET 3001! (Crash Course)
How to import a component from the library browser
How to wire the pins of a component
Special: No forward/backward annotation (reannotate) between schematic and layout needed. Every change you make is noticed directly on the other side. Single source principle. No conflicts of project versions. Easy to learn: Nearly every command identical in schematic and PCB.

