Difference between revisions of "PCB without schematic"
(→Help, I have a short circuit!) |
|||
| (8 intermediate revisions by the same user not shown) | |||
| Line 1: | Line 1: | ||
| + | The [[Project|project kind]] (with or without schematic) is determined in the ''Start Assistant'' when starting a new project:<br><br> | ||
| + | [[Image:e_New.jpg|500px|The Start Assistant|The Start Assistant]]<br><br> | ||
| − | |||
| + | == General reflections == | ||
| − | + | The decision for a project "PCB without schematic" is made when starting the project. Once the decision is made, it is irreversible for this project. This means that a schematic can not be added later. However, in a project with schematic it is possible to separate the schematic from a "PCB with circuit diagram". A copy of the layout is made then and treated as a "project without schematic". <br><br> | |
| − | + | == Import a component package == | |
| − | + | For the fact that you don't need symbols but only packages the database opens in the package browser when you press '''[Ins]''' to import a part. Alternatively you might use the icon [[Image:InsertPackage1.jpg]]. In the middle of the right hand side of the dialog please enter your catchword in order to find a suitable package. Highlight it and import it to the layout.<br><br> | |
| − | + | [[Image:PackBrwsDlg.jpg|500px|The component browser opens in tab Packages|The component browser opens in tab Packages]].<br><br> | |
| − | |||
| − | [[Image:PackBrwsDlg.jpg|500px| | ||
<br> | <br> | ||
| − | == | + | == Place air wires == |
[[Image:LuftlVerl.jpg]]<br><br> | [[Image:LuftlVerl.jpg]]<br><br> | ||
| − | + | After all packages are placed, now please create the electrical connections by air wires. Click from pad to pad according to your wishes. It is possible to place tracks instantly but without air wires the autorouter could not do his job.<br><br> | |
[[Image:LuftlVerl1.jpg]]<br><br> | [[Image:LuftlVerl1.jpg]]<br><br> | ||
| − | |||
| + | == Help, I am shorting out! == | ||
| + | |||
| + | If you have connected a soldering point incorrectly, maybe even already with a track, then first delete the track. Probably a green airline will then appear because the soldering point still feels belonging to the pin. Double-click ([https://server.ibfriedrich.com/wiki/ibfwikien/index.php?title=Conventions M11]) on the soldering point to delete its signal in the soldering point dialogue that opens (= empty the "Signal" field).<br><br>If the enclosure dialogue opens instead of the soldering point dialogue, then switch off "[https://server.ibfriedrich.com/wiki/ibfwikien/index.php?title=Always_select_entire_component Always select entire component]" beforehand.<br><br><br> | ||
| − | == | + | == Place tracks ... == |
| − | |||
| − | |||
| + | === ...by hand === | ||
| − | + | Please have a look here: [[Place tracks by hand ]]<br> | |
| + | Or in general: [[Track ]] | ||
| − | + | === ...by one of the autorouters === | |
| − | + | Please have a look here: [[Place tracks|Place tracks by the autorouter]]<br> | |
| + | Or in general: [[Autorouter]].<br><br><br> | ||
| − | [[de:Platine ohne Schaltplan | + | [[de:Platine ohne Schaltplan]][[fr:PCB sans schéma]] |
Latest revision as of 13:27, 30 June 2021
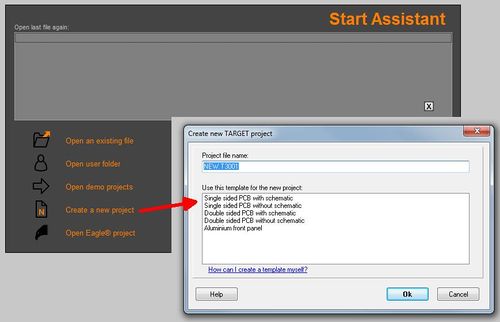
The project kind (with or without schematic) is determined in the Start Assistant when starting a new project:

Contents
General reflections
The decision for a project "PCB without schematic" is made when starting the project. Once the decision is made, it is irreversible for this project. This means that a schematic can not be added later. However, in a project with schematic it is possible to separate the schematic from a "PCB with circuit diagram". A copy of the layout is made then and treated as a "project without schematic".
Import a component package
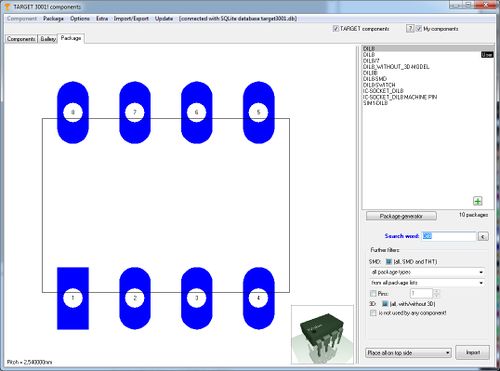
For the fact that you don't need symbols but only packages the database opens in the package browser when you press [Ins] to import a part. Alternatively you might use the icon ![]() . In the middle of the right hand side of the dialog please enter your catchword in order to find a suitable package. Highlight it and import it to the layout.
. In the middle of the right hand side of the dialog please enter your catchword in order to find a suitable package. Highlight it and import it to the layout.
Place air wires
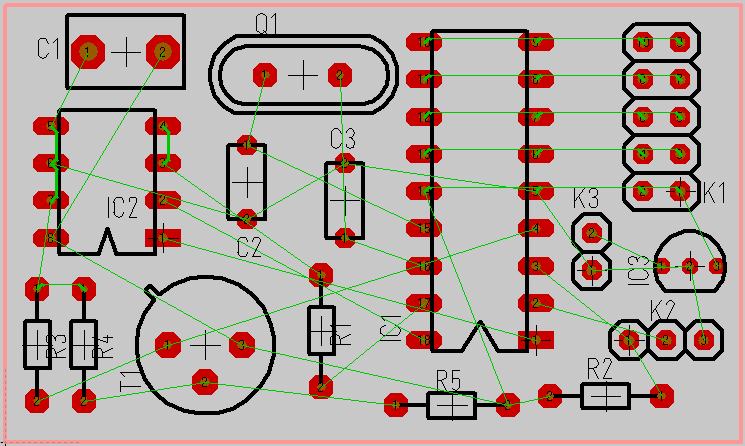
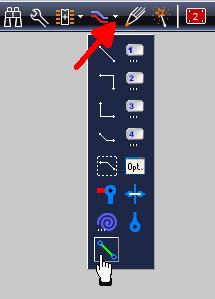
After all packages are placed, now please create the electrical connections by air wires. Click from pad to pad according to your wishes. It is possible to place tracks instantly but without air wires the autorouter could not do his job.

Help, I am shorting out!
If you have connected a soldering point incorrectly, maybe even already with a track, then first delete the track. Probably a green airline will then appear because the soldering point still feels belonging to the pin. Double-click (M11) on the soldering point to delete its signal in the soldering point dialogue that opens (= empty the "Signal" field).
If the enclosure dialogue opens instead of the soldering point dialogue, then switch off "Always select entire component" beforehand.
Place tracks ...
...by hand
Please have a look here: Place tracks by hand
Or in general: Track
...by one of the autorouters
Please have a look here: Place tracks by the autorouter
Or in general: Autorouter.


