Symbol
General
A symbol in TARGET 3001! is the "schematic fraction" of a component. A component can have one or more symbols (eg. device having multiple gates - each of the gates can get a separate symbol). The other "fraction" of a component is it's package proposal with its 3D model. How to draw a custom symbol and how to assign a package to it, please find in the edit component article.
Import a Symbol
Alternatively press key [Ins] or key [i] or select the command from the menu. This function is used to insert the (first symbol or further) symbol(s) of a component. The following picture shows the library browser in TARGET 3001! V14 where a view of the symbol as well as the package is given (toggle both):
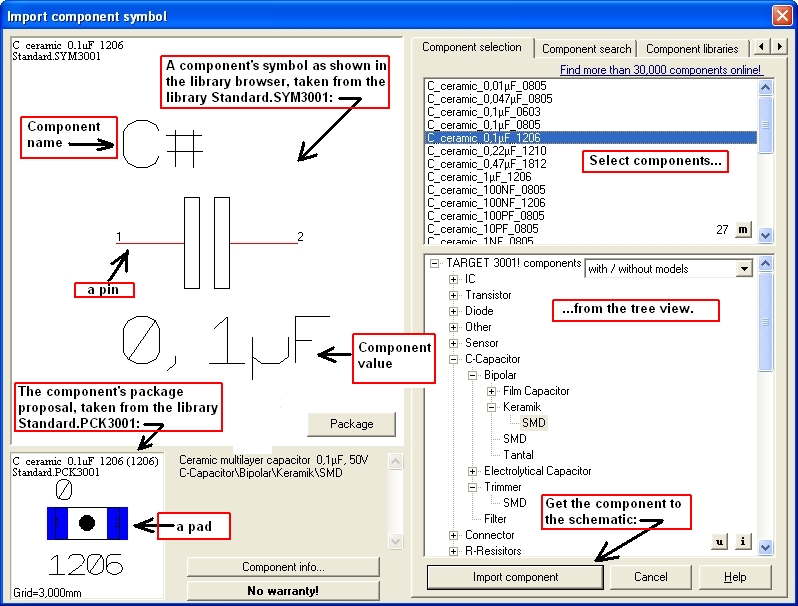
To the left you see the symbol or the package of the symbol. After confirming the import dialog, the first symbol of the component is inserted to the schematic. The outline of the symbol is attached to the cursor (move mode) and can be placed once or several times by M1. Click M2 during the import process to rotate the symbol if necessary. Your cursor gets rid of the component by pressing M12. The component is automatically numbered consecutively (for example: . C1, C2...). If the symbol includes also text, the following replacements are made:
- the name !COMPONENT or a text which is saved as the component name is replaced by a component designator (IC1, R1, C1,...);
- the name !SYMBOL or a text which is saved as the symbols name is replaced by a symbol designator (IC1a, IC1b,...);
- the name !VALUE or a text which is saved as the component value is replaced with a component value (4000, R, C,...). The component values eg 4000 or R should be changed afterwards to CD4000 and 4k7 with a click on M11 on the symbol handle. With this function, only symbols with the attribute: "Import Rest of Components" are inserted from the library (for example both NOR-gates of the CMOS 4000).
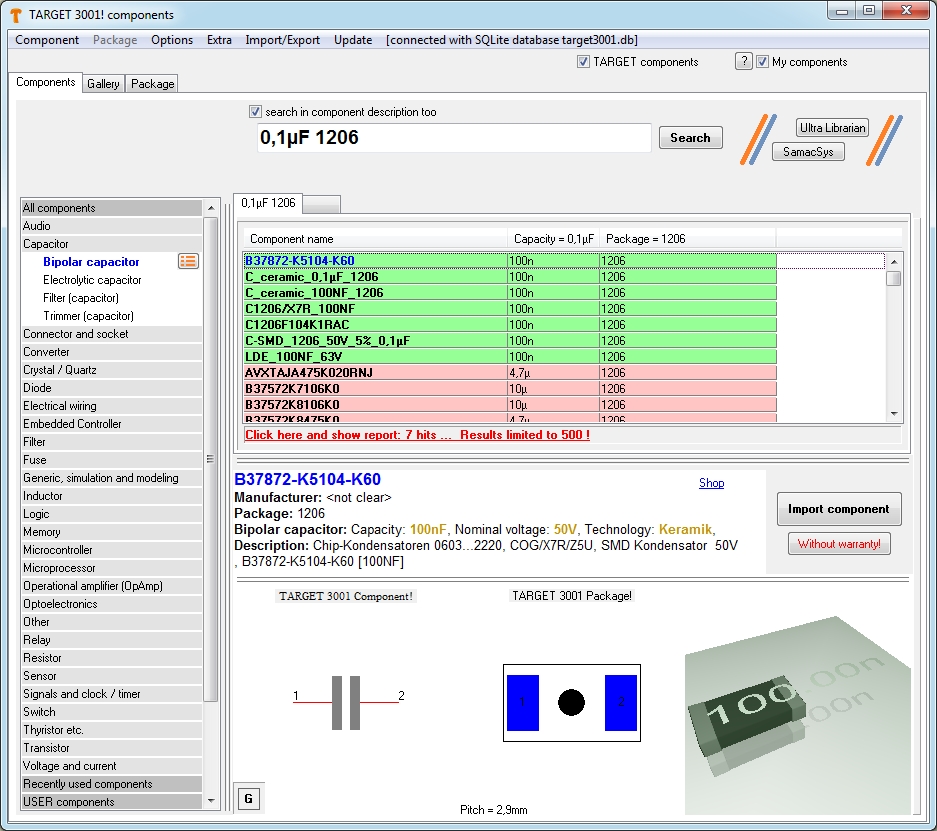
Using V15 you would open the component database by key [Ins], search for 0,1µF and a 1206 package and have the following image:
After import to the schematic it would look like this:
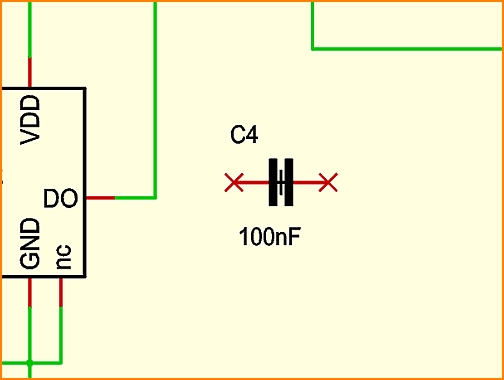
For the fact that already three capacitors have been used in this schematic example, the new one gets number four (= it's component name). The next step would be to connect the pins by the use of the "draw signal" tool ![]() or easily by pressing key [2]. After correct connection the red crosses at the end of the leads will fade. A double click on the handle cross opens the dialog: "Change symbols", a double click on the pin opens the dialog "Change pins". A double click on each of the texts opens the dialog "Change Texts". In case you can not highlight a single part of the symbol but only the whole symbol, please release this button (under the pointer tool):
or easily by pressing key [2]. After correct connection the red crosses at the end of the leads will fade. A double click on the handle cross opens the dialog: "Change symbols", a double click on the pin opens the dialog "Change pins". A double click on each of the texts opens the dialog "Change Texts". In case you can not highlight a single part of the symbol but only the whole symbol, please release this button (under the pointer tool): ![]()
.
Last 20 components used
This feature eases the import of components enormously, when you are handling lots of components in one project. The 20 lately components used are listed for a quick mouse click selection. It appears after click on the "Insert symbol" function unless you didn't deactivate it. To deactivate this dialog please tick the box: "Don't show this dialog again."
If you want to delete a line from the list (or even all), please highlight a lign blue and press the little cross at the bottom right of the list area.
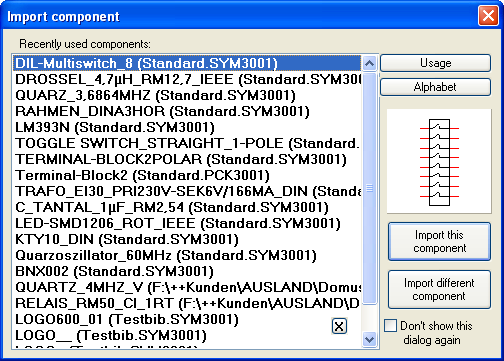
Image: Last 20 used components in V14
In V15 you will find this option in the database browser here:
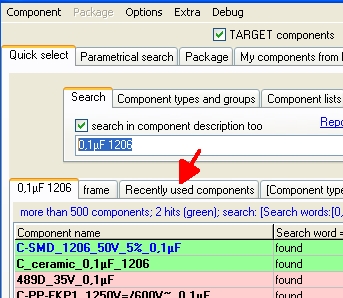
Image: Recently used components in V15 .
Compose a symbol
See also Edit component
A component in the schematic contains at least one or more symbols. A symbol is made of several drawing elements (lines, pins etc..), which have been composed to a complete signal sometime ago with the help of this menu command, or it needs to be composed to a complete signal (recreation of a component). Select the according drawing elements who should belong to a symbol and call this function. Afterwards, click M1 on the spot where the handle of the symbol should appear. You can also use the [y] key for this function. The cursor should be placed on the spot where the handle should appear. Call the options dialog with M11 or [o] and set the attributes of the symbol to be created next.
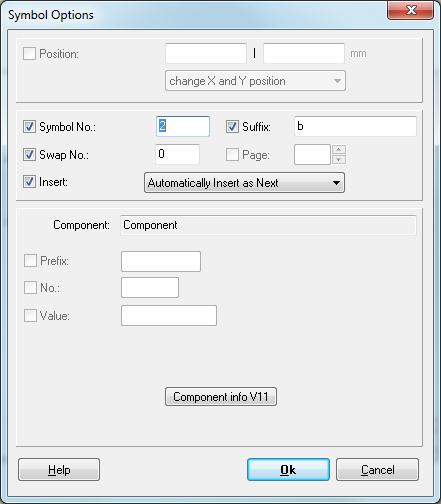
The symbol number should start with one in any case. The suffix is the designator of this symbol (for example: a bei IC1a). TARGET 3001! automatically increase the symbol number and the suffix when a new symbol is created. The swap number can only be inserted afterwards by a click with M11 on the symbol handle. A value other than 0 (zero) means: Symbols in a component with the same swap number can be exchanged (symbol change, gate change). The entries for the Insert mode have the following meaning:
Insert automatically as next means that the symbol will be imported into the schematic, when you select next time the Import symbol command. If all as next- symbols of a component are used, a new component will be started.
Insert extra as Rest means that the symbol will only be imported into the schematic on special request. You must place it directly with the help of the command Import Rest.
Swap Number: Symbols, who have the same swap number in the component, can be exchanged with each other (symbol-/gate exchange). The swap number must be greater than 0 (zero). Page: The page where the symbol is currently placed.
.
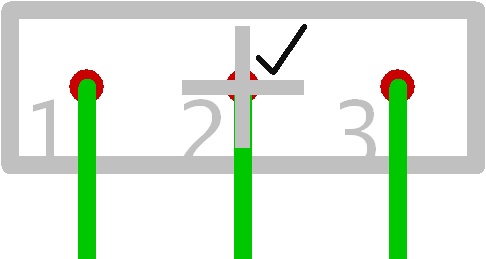
A tick at the handle
The handle cross of a symbol (schematic) gets a tick, if a corresponding package is placed already in the layout.
