Mousekeys
Mouse button settings
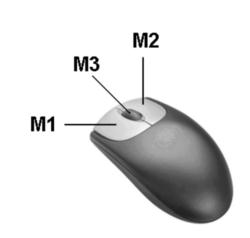
The mouse can be used to initiate several functions and tasks by "Single Clicking" (Mx),
"Double Clicking" (Mxx), or "Long Clicking" (click and holding) (MxH) the following mouse keys:
M1= A click and release of the left mouse button
M2= A click and release of the right mouse button
M3= If there is a mouse wheel, scroll it to zoom in and out. In "Place track" mode click it to plce a via and change the layer
M11= Double click the left mouse key
M22= Double click the right mouse key
M12= Simultaneously click both right and left mouse button
M1H= Click and hold the left mouse key
M2H= Click and hold the right mouse key
M3H= Hold the scrolling wheel and move the mouse: Moves the whole sheet.
Left mouse key
This mouse key is used to highlight (select/mark) various elements (e.g. lines, signal tracks, components, packages, etc.) by moving the cursor over the element and clicking the left mouse key. Highlighted elements can then by dragged and displace (moved) using the mouse keys. The following actions can be carried out while in Pointer mode:
Highlighting (marking) an element, signal or component:
An element is marked by clicking M1 on the desired element or elements handle. Clicking M1 at a free area in the project will unmark all marked elements. Certain "Pointer Mode" settings can be used while highlighting signals. These settings are found by going to the toolbar and selecting "Settings for the pointer mode" and they carry the following effects:
![]() Clicking M1 highlights a single element of a signal
Clicking M1 highlights a single element of a signal
![]() Clicking M1 highlights a branch of a signal
Clicking M1 highlights a branch of a signal
![]() Clicking M1 highlights an island of a signal
Clicking M1 highlights an island of a signal
![]() Clicking M1 highlights the complete signal
Clicking M1 highlights the complete signal
While highlighting components, these settings can be of use. They are also found by selecting "Settings for the pointer mode" located on the toolbar and carry out the following effects:
![]() The entire symbol/package is marked by clicking the handle
The entire symbol/package is marked by clicking the handle
![]() The entire symbol/package is marked by clicking any element/part of the component
The entire symbol/package is marked by clicking any element/part of the component
Marking and Unmarking Additional Elements:
After selecting a desires element/component, additional elements can be marked to can be from a group of selected elements. This is done by clicking [Shift]+M1 onto any additional elements. This method can also be used to subtract an element from a group.
Editing a Marked Element:
Double clicking a desired elements with M11 will open a dialog box in which the preferences of the selected elements can be altered. This function can also be carried out by a combination of the [s] (select) and [e] (edit) keys. If elements are overlapping then use [Shift]+[Ctrl]+[M11] to select the elements on the bottom layer.
Marking various Elements in an Area Simultaneously:
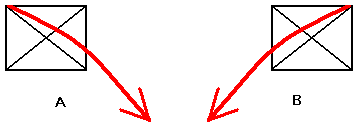
This is done by clicking M1H in an empty spot then creating a rectangular window by dragging for top-left to bottom-right (A). All elements completely coverd by this highlighting rectangle will be marked. If you drag the rectangle from top-right to bottom-left, you will highlight those elements that are only touched by the rectangle (B).
Marking Additional Elements in an Area:
This method grants you the ability to add a group of elements to another group of elements. This method is similar to the previous except that this time you will click [Shift]+[M1H] to create a rectangular window over the additional elements. When you’re done, the new set of elements will be combined with the previous set of elements.
Moving Elements:
Click a marked element or group of elements with M1H and drag the elements (by moving the mouse) to a desired location, then release M1H to drop them in that area. Please note that all marked elements will be moved.
Bending or Dragging an Elements:
Hold down the [Ctrl] key the move the element(s) with M1H. If you click a corner of a rectangular/triangle or the bend in an area will be moved to a different location. If you click the middle of a line, the will split into two segments or be changed into an "arc" or "bizier-curve". Clicking M2 opens a context-menu. You view these following tool/setting found at by going to the toolbar and selecting "Settings for the pointer mode" and they carry the following effects:
![]() Dragging the Centre of a segment with [Ctrl]+M1H will create a new Angle
Dragging the Centre of a segment with [Ctrl]+M1H will create a new Angle
![]() Dragging the Centre of a segment with [Ctrl]+M1H will create an Arc
Dragging the Centre of a segment with [Ctrl]+M1H will create an Arc
![]() Dragging the Centre of a segment with [Ctrl]+M1H will create a Spline Curve
Dragging the Centre of a segment with [Ctrl]+M1H will create a Spline Curve
Right mouse key
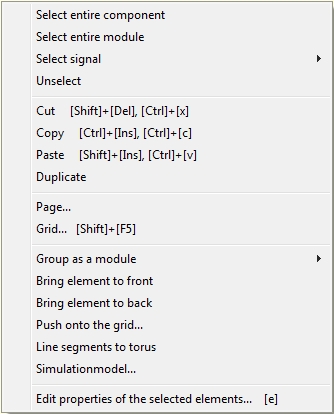
Clicking the right mouse key (M2) opens a context menu. Functions such as Zoom-in, Zoom-out and others can be set in the Settings/Settings (INI-File) menu.
M22: This button Zooms-out of the area around the cursor’s current location.
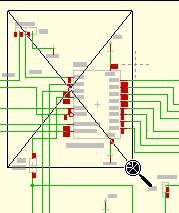
M2H: This can be used to create a "Zoom Window" by moving the mouse with M2H from top left to bottom right which will activate the "Zoom-in" function in the area. Please note: the smaller the window, the greater the zoom. This function can also be activated by selecting "View" from the toolbar and then "Zoom Area":
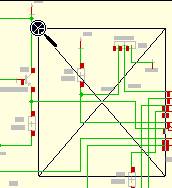
M2H: This can be used to create a "Zoom Window" by moving the mouse with M2H from the bottom-right to the top-left which will activate the "Zoom-out" function and cause the project to be displayed at its maximum size (with relation to the size of the project). You can also activate this function by clicking the [F7] key:
[Shift]+[Ctrl]+M2: This will maximize the window of the current project and display the maximum size of that project simultaneously.
[Shift]+M2H: or
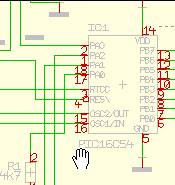
[Ctrl]+M2H: This allows to move the complete canvas at current zoom scale. The cursor changes this way:
Please note that some mouse drivers (programs that enable the operation of a mouse) an individual customization of the mouse button functions. Therefore you should always set the functions to "Standard Click".
Middle mouse key / scrolling wheel
The mouse wheel in TARGET 3001! is used to "scroll" or "zoom". These functions can be set in menu Settings/Settings (INI-File...).
If you are in "Place track" mode, a click with the mouse wheel places a via and changes the layer side
In menu Settings/Settings (INI-file...) opens a dialog box called "Object Inspector" where you can manipulate various settings in TARGET 3001!. Use the scrollbar to scroll down until you see the following line in which the "mouse wheel zoom" setting can be configure.
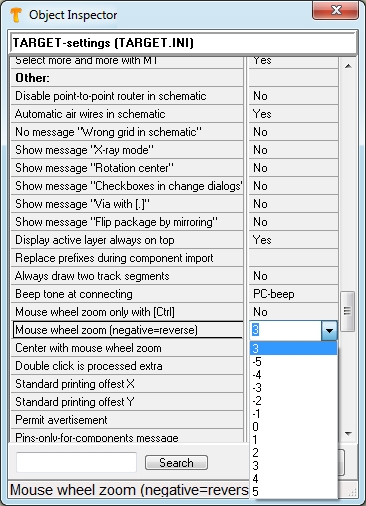
The settings are displayed as members ranging form -5 to +4. Their meanings are as follows:
0= no zoom but scrolling up & down
1= zoom in at 10% by scrolling up
2= zoom in at 20% by scrolling up
3= zoom in at 30% by scrolling up
4= zoom in at 40% by scrolling up
-1= zoom out at 10% by scrolling up
-2= zoom out at 20% by scrolling up
-3= zoom out at 30% by scrolling up
-4= zoom out at 40% by scrolling up
-5= zoom out at 50% by scrolling up
Note: It you set the mouse wheel to a "negative" number then scrolling up will "zoom out" and scrolling down will "zoom in". If the number is “positive”, then scrolling up will “zoom in” and scrolling down will "zoom out".
If your mouse does not have a scrolling wheel but has a middle mouse button, then that button will also function as M2.
Click and hold the mouskey M3H allows to move the whole sheet.
Mouse movement
The mouse movement can depend on the grid or, when drawing lines and tracks, also on the bending mode.
From V33 onwards, you can use the [Shift] or [Ctrl] keys for many mouse actions to force the mouse movement in exactly right-angled directions or to exactly 45 degrees:

(Image: Eight exact directions)
Toggle zoom and scroll
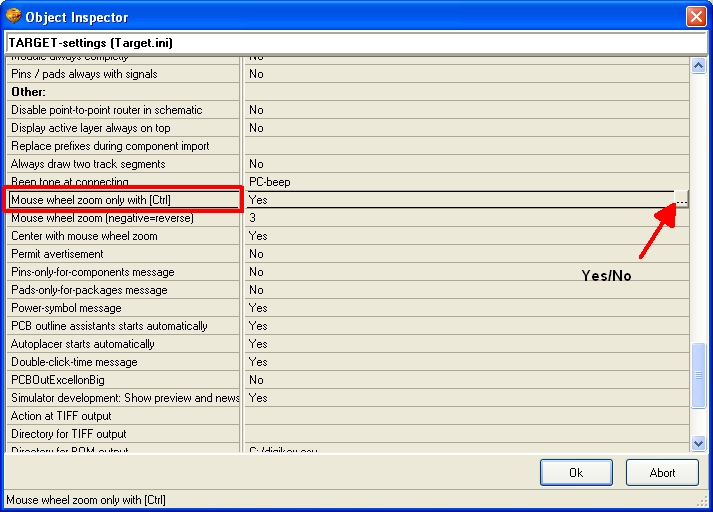
Using the [Ctrl] key you can toggle between scroll and zoom. You need to set in menu "Settings/Settings (INI-File)" the entry "Mouse wheel zoom only with [Ctrl]" to Yes:
Center by zoom
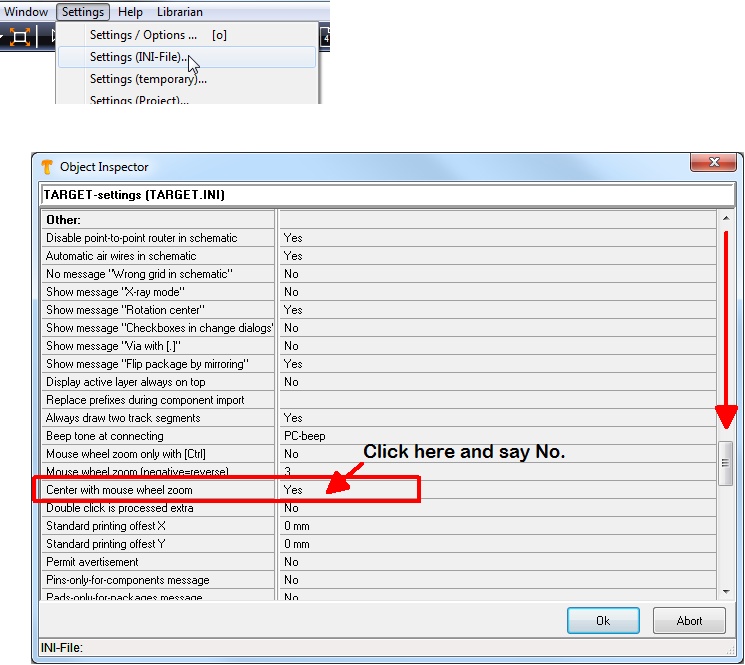
If you want to switch off the function of centering an image at cursor tip when scrolling/zooming please set it in the Settings(INI-File)..., see image:
Scroll down and look at "Center with mouse wheel zoom." Click the line to the right and go to the end of the line. Press the little button with the three dots. This will change the "Yes" to a "No."
Besides - you can move the whole sheet by [Ctrl]+ [M2H] . This allows to bring parts of interest of your design to the center of screen (or wherever you like to move them...)
Cursor animation
Your cursor can perform animated e.g. when zooming the cursor reacts a bit "laid back" to give the impression of a movement. This behaviour can be switched on and off. See menu "Settings/ Settings (INI-file)"...
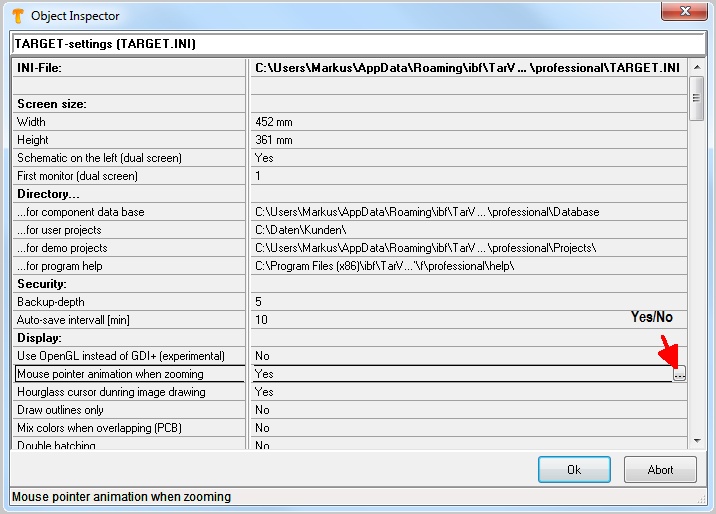
Image: Cursor animation when zooming can be switched on and off.
Left and right mouse key
Clicking both left and right mouse keys simultaneously (M12) will abort (close) the current action (which is completely similar to pressing the [Esc] key) and will carry you back to pointer mode by default.


