Mode: Difference between revisions
No edit summary |
No edit summary |
||
| (2 intermediate revisions by the same user not shown) | |||
| Line 8: | Line 8: | ||
If you had selected a mode you can press key '''[o]''' for '''O'''ptions. The flashing dialog allows further settings regarding the mode. After you had placed the via you might doubleclick it for modifications.<br> | If you had selected a mode you can press key '''[o]''' for '''O'''ptions. The flashing dialog allows further settings regarding the mode. After you had placed the via you might doubleclick it for modifications.<br> | ||
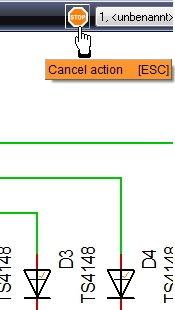
Get rid of the mode/return to pointer mode which is the initial state by [ESC] or M12 or by the use of the STOP button:<br><br> | |||
[[image:stop_button.jpg|The stop button cancels an action, makes you return to the pointer mode]]<br>Image: Use the STOP button to return to pointer mode.<br><br> | |||
[[category:Modes]] | [[category:Modes]] | ||
[[de:Modus]] | [[de:Modus]] | ||
[[fr:Mode]] | [[fr:Mode]] | ||
Latest revision as of 10:58, 1 September 2016
According to the kind of command TARGET 3001! can achieve more than one working modes. If you eg intend to place a via you first must inform TARGET 3001! that you want to do so. The second step is to define the exact location of the via. This is a general principle in TARGET 3001!. After selecting this function (eg in Menu Elements / "Place a via") the shape of the cursor changes: ![]()
Now you are in working mode "Place Via". Now place the via by M1 at cursor position or in this special case also by key [.] at cursor position.
The status bar on the bottom of the screen shows the current mode. Additionally some key combinations are shown, which have a meaning in this context.
If you had selected a mode you can press key [o] for Options. The flashing dialog allows further settings regarding the mode. After you had placed the via you might doubleclick it for modifications.
Get rid of the mode/return to pointer mode which is the initial state by [ESC] or M12 or by the use of the STOP button:


