Symbol: Difference between revisions
| Line 80: | Line 80: | ||
The '''Swap No''' can only be changed afterwards for each gate (sub symbol) individually. A value different from zero means: sub symbols having the same swap number in a component can be exchanged against each other (symbol swap, gate swap).<br> | The '''Swap No''' can only be changed afterwards for each gate (sub symbol) individually. A value different from zero means: sub symbols having the same swap number in a component can be exchanged against each other (symbol swap, gate swap).<br> | ||
'''Page:''' The schematic page on which the symbol currently is located.<br> | '''Page:''' The schematic page on which the symbol currently is located.<br> | ||
'''Insert:''' The entry | '''Insert:''' The entry ''Automatically insert as next'' means that the following sub symbol (gate) will be inserted next into the schematic. This attribute will be used for normal gates and for parts consisting only of one symbol. If all "nexts" are inserted, a new part is taken. ''Extra Insert as "Rest"'' means that this sub-symbol will be inserted only after a separate request by the user into the schematic. The function required is menu "Components/Import Rests of Components". You also might use the shortcut [Ctrl]+[r]. This attribute is used e.g. for power supply symbols. '''Achtung:''' Mindestens ein Symbol muss die Eigenschaft "als nächstes" haben, sonst ist das Bauteil komplett unbrauchbar!<br> | ||
'''Component:''' Diese Zeile beinhaltet den Bauteilnamen und den Bauteilwert. Der Bauteilname besteht aus dem Präfix und der Bauteilnummer<br> | '''Component:''' Diese Zeile beinhaltet den Bauteilnamen und den Bauteilwert. Der Bauteilname besteht aus dem Präfix und der Bauteilnummer<br> | ||
'''Simulationswerte:''' Ob ein Bauteil ein Simulationsmodell hat und wenn ja welches, erfahren Sie hier. Sollte es keines haben, finden Sie Informationen, wie man ein Simulationsmodell findet resp. dem Bauteil beifügt.<br> | '''Simulationswerte:''' Ob ein Bauteil ein Simulationsmodell hat und wenn ja welches, erfahren Sie hier. Sollte es keines haben, finden Sie Informationen, wie man ein Simulationsmodell findet resp. dem Bauteil beifügt.<br> | ||
Revision as of 08:38, 19 August 2014
General
A symbol in TARGET 3001! is the "schematic fraction" of a component. A component can have one or more symbols (eg. device having multiple gates - each of the gates can get a separate symbol). The other "fraction" of a component is it's package proposal with its 3D model. How to draw a custom symbol and how to assign a package to it, please find in the edit component article.
Import a Symbol
Alternatively press key [Ins] or key [i] or select the command from the menu. This function is used to insert the (first symbol or further) symbol(s) of a component. Open the component database by key [Ins], search for 0,1µF and a 1206 package and have the following image:
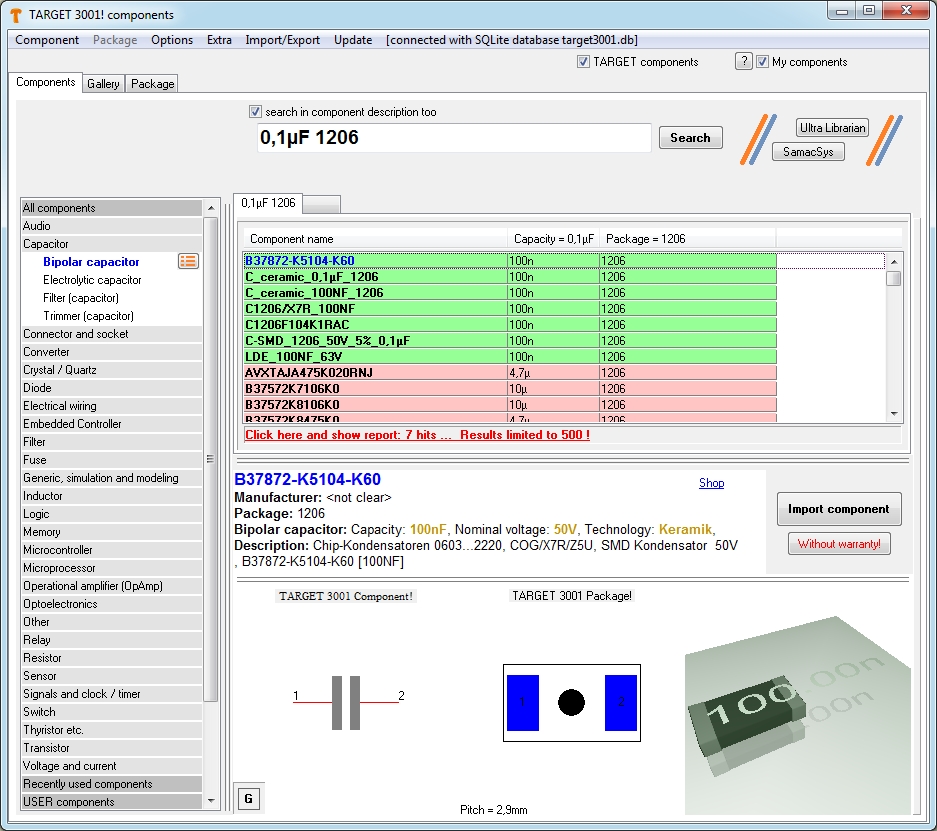
A right mouseclick on one of the three images would allow to edit it. A context menu opens in this respect.
After pressing the button "Import component" it would look like this:
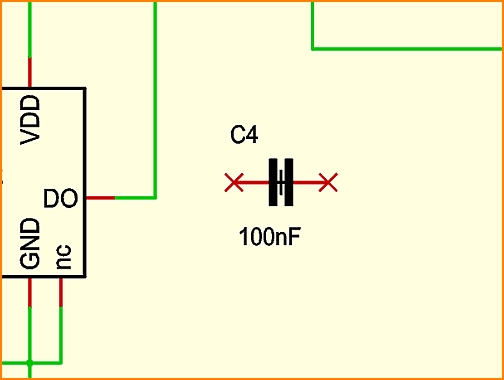
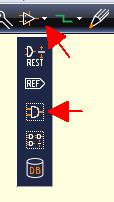
For the fact that already three capacitors have been used in this schematic example, the new one gets number four (= it's component name). The next step would be to connect the pins by the use of the "draw signal" tool ![]() or easily by pressing key [2]. After correct connection the red crosses at the end of the leads will fade. A double click on the handle cross opens the dialog: "Change symbols", a double click on the pin opens the dialog "Change pins". A double click on each of the texts opens the dialog "Change Texts". In case you can not highlight a single part of the symbol but only the whole symbol, please release this button (under the pointer tool):
or easily by pressing key [2]. After correct connection the red crosses at the end of the leads will fade. A double click on the handle cross opens the dialog: "Change symbols", a double click on the pin opens the dialog "Change pins". A double click on each of the texts opens the dialog "Change Texts". In case you can not highlight a single part of the symbol but only the whole symbol, please release this button (under the pointer tool): ![]()
The following picture shows the library browser in TARGET 3001! V14 and earlier where a view of the symbol as well as the package is given (toggle both):
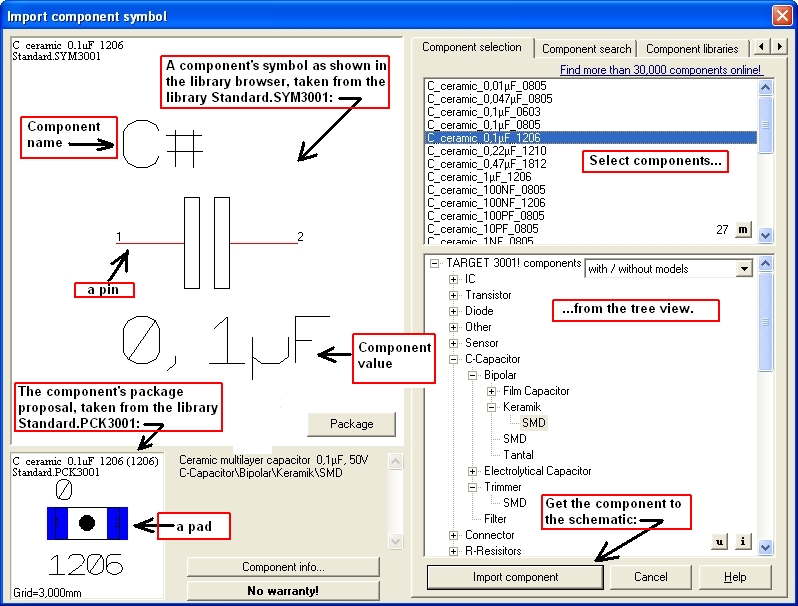
To the left you see the symbol or the package of the symbol. After confirming the import dialog, the first symbol of the component is inserted to the schematic. The outline of the symbol is attached to the cursor (move mode) and can be placed once or several times by M1. Click M2 during the import process to rotate the symbol if necessary. Your cursor gets rid of the component by pressing M12. The component is automatically numbered consecutively (for example: . C1, C2...). If the symbol includes also text, the following replacements are made:
- the name !COMPONENT or a text which is saved as the component name is replaced by a component designator (IC1, R1, C1,...);
- the name !SYMBOL or a text which is saved as the symbols name is replaced by a symbol designator (IC1a, IC1b,...);
- the name !VALUE or a text which is saved as the component value is replaced with a component value (4000, R, C,...). The component values eg 4000 or R should be changed afterwards to CD4000 and 4k7 with a click on M11 on the symbol handle. With this function, only symbols with the attribute: "Import Rest of Components" are inserted from the library (for example both NOR-gates of the CMOS 4000).
Last 20 components used
This feature eases the import of components enormously, when you are handling lots of components in one project. The 20 lately components used are listed for a quick mouse click selection. It appears after click on the "Insert symbol" function unless you didn't deactivate it. To deactivate this dialog please tick the box: "Don't show this dialog again."
If you want to delete a line from the list (or even all), please highlight a lign blue and press the little cross at the bottom right of the list area.
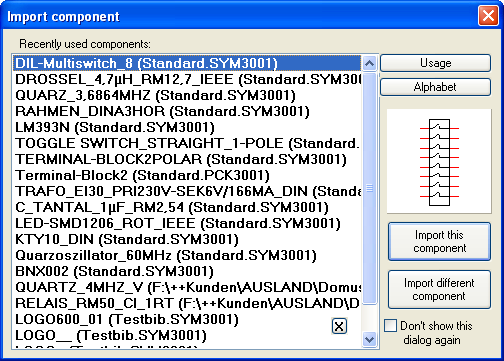
Image: Last 20 used components in V14
In V15 you will find this option in the database browser here:
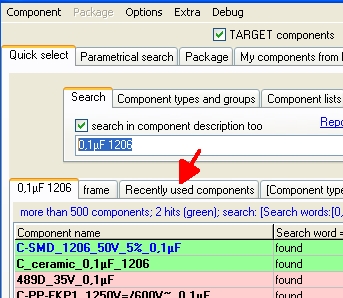
Image: Recently used components in V15 .
Compose a symbol
See also Edit component
A component in the schematic contains at least one or more symbols, e. g. gates. A symbol is made of several drawing elements (lines, pins etc..), which have been composed to a complete signal sometime ago with the help of this menu command, or it needs to be composed to a complete signal (recreation of a component). Select the respective drawing elements which should belong to a symbol and use this function. Afterwards, click M1 on the spot where the handle of the symbol should appear. You can also use the [y] key for this function after the cursor has been hovered to the desired location of the handle cross. The cursor should be placed on the spot where the handle should appear. Call the options dialog with M11 or [o] and set the attributes of the symbol to be created next.
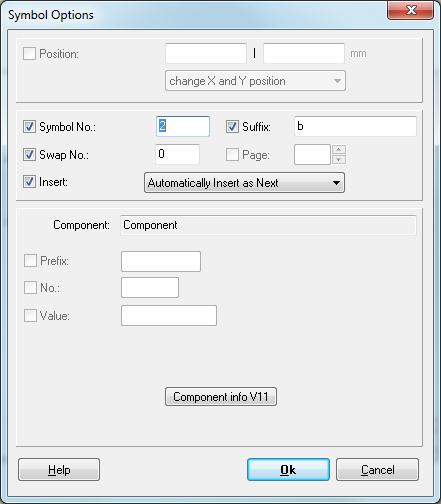
The symbol number should start with one in any case. The suffix is the designator of this symbol (for example: a bei IC1a). TARGET 3001! automatically increase the symbol number and the suffix when a new symbol is created. The swap number can only be inserted afterwards by a click with M11 on the symbol handle. A value other than 0 (zero) means: Symbols in a component with the same swap number can be exchanged (symbol change, gate change). The entries for the Insert mode have the following meaning:
Insert automatically as next means that the symbol will be imported into the schematic, when you select next time the Import symbol command. If all as next- symbols of a component are used, a new component will be started.
Insert extra as Rest means that the symbol will only be imported into the schematic on special request. You must place it directly with the help of the command Import Rest.
Swap Number: Symbols, who have the same swap number in the component, can be exchanged with each other (symbol-/gate exchange). The swap number must be greater than 0 (zero). Page: The page where the symbol is currently placed.
Change Symbols
Set the Options or adapt the Properties of existing symbols for components to come here.
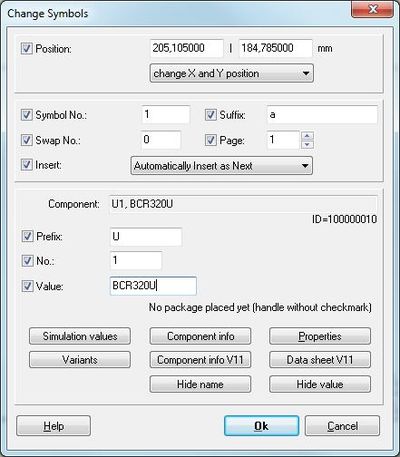
The Position is determined by the x-y- coordinates of the handle cross.
The Symbol No should start with 1 for every component.
The Suffix is the appendage for this symbol (e. g. the "a" in IC1a). Symbol number and suffix are counted further with every new subsymbol. An IC can have several sub symbols - each representing a gate for example.
The Swap No can only be changed afterwards for each gate (sub symbol) individually. A value different from zero means: sub symbols having the same swap number in a component can be exchanged against each other (symbol swap, gate swap).
Page: The schematic page on which the symbol currently is located.
Insert: The entry Automatically insert as next means that the following sub symbol (gate) will be inserted next into the schematic. This attribute will be used for normal gates and for parts consisting only of one symbol. If all "nexts" are inserted, a new part is taken. Extra Insert as "Rest" means that this sub-symbol will be inserted only after a separate request by the user into the schematic. The function required is menu "Components/Import Rests of Components". You also might use the shortcut [Ctrl]+[r]. This attribute is used e.g. for power supply symbols. Achtung: Mindestens ein Symbol muss die Eigenschaft "als nächstes" haben, sonst ist das Bauteil komplett unbrauchbar!
Component: Diese Zeile beinhaltet den Bauteilnamen und den Bauteilwert. Der Bauteilname besteht aus dem Präfix und der Bauteilnummer
Simulationswerte: Ob ein Bauteil ein Simulationsmodell hat und wenn ja welches, erfahren Sie hier. Sollte es keines haben, finden Sie Informationen, wie man ein Simulationsmodell findet resp. dem Bauteil beifügt.
Bauteil-Info: Wenn eine Bestellnummer des Bauteils bei diversen Lieferanten bekannt (in den Bauteileigenschaften hinterlegt) ist, finden Sie sie hier.
Eigenschaften: Der wichtigste Informationspool eines Bauteils...
Varianten: TARGET 3001! kann bis 256 Bestückungsvarianten verwalten. Ob dieses Bauteil in mehreren Bestückungsvarianten erscheint, sehen Sie hier.
Bauteil-Info V11: Dieser Knopf offnet die Bauteilinformationen in der Art, wie Sie sie eventuell bereits in V11 hinterlegt hatten.
Datenblatt V11: Wenn Sie bereits in V11 Datenblattlinks zu einem Bauteil hinterlegt hatten, finden Sie hier diese Informationen in V11 Manier.
Name ein-/ausblenden:, Wert ein-/ausblenden: diese beiden Knöpfe sind selbstredend. Mann kann Bauteilname und Bauteilwert auch einfach mit der [Entf]-Taste löschen, um sie später mittels der Funktion Bauteilname bzw. Bauteilwert im Text-Dialog wieder herein zu holen.
Was bedeuten die Häkchen vor den jeweiligen Einträgen?
Zu diesem Thema habe ich eine Frage
.
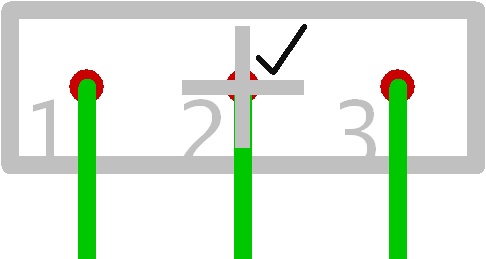
A tick at the handle
The handle cross of a symbol (schematic) gets a tick, if a corresponding package is placed already in the layout.
