Difference between revisions of "Pick and place"
(→Benutzerdefinierte Eigenschaft) |
|||
| Line 11: | Line 11: | ||
| − | == | + | == User defined property == |
| − | + | Maybe you'd like to put out a certain property of the components to the pic & place list, for example the stock number. Precondition is, that the components in question show this property and a value to this property is given. So add to the last but one line: ,"Prop=STOCKNUMBER"- important is the comma and the quotation marks. In the layout you for example have 5 components in use, furnished with individual stoch mumbers:<br><br> | |
| − | |||
{| border="1" cellspacing="5" cellpadding="5" | {| border="1" cellspacing="5" cellpadding="5" | ||
|- | |- | ||
| − | |<center>NAME</center>||<center> | + | |<center>NAME</center>||<center>STOCKNUMBER</center>||<center>Number</center> |
|- | |- | ||
|<center>TLE4205</center>||<center>250</center>||<center>1</center> | |<center>TLE4205</center>||<center>250</center>||<center>1</center> | ||
| Line 28: | Line 27: | ||
|} | |} | ||
| − | <br><br> | + | <br><br>In the Pic&Place dialog it looks like that:<br><br> |
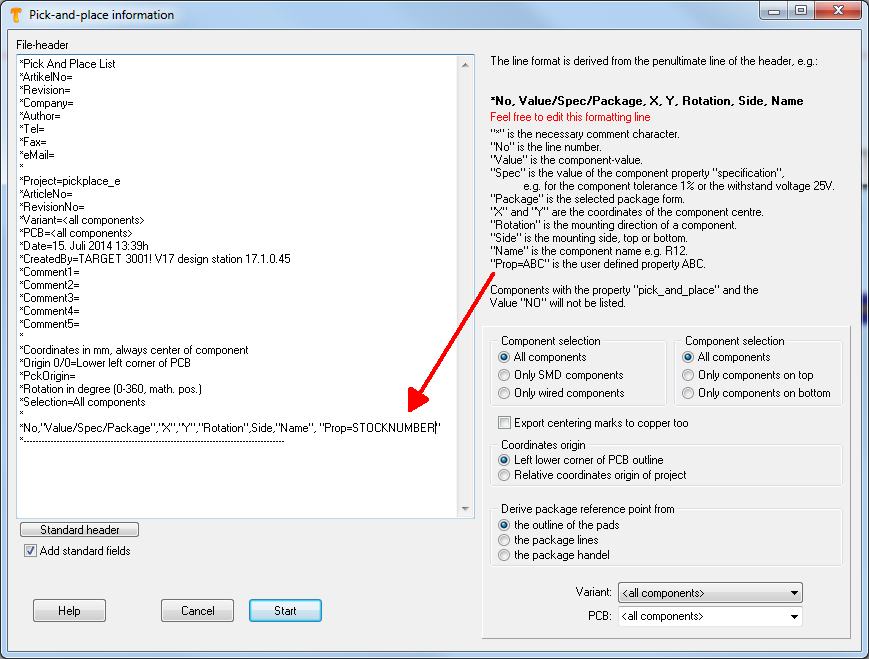
[[Image:PickPlaceProp1.jpg]]<br>Bild: Der Pic&Place-Dialog <br><br> | [[Image:PickPlaceProp1.jpg]]<br>Bild: Der Pic&Place-Dialog <br><br> | ||
Revision as of 14:31, 15 July 2014
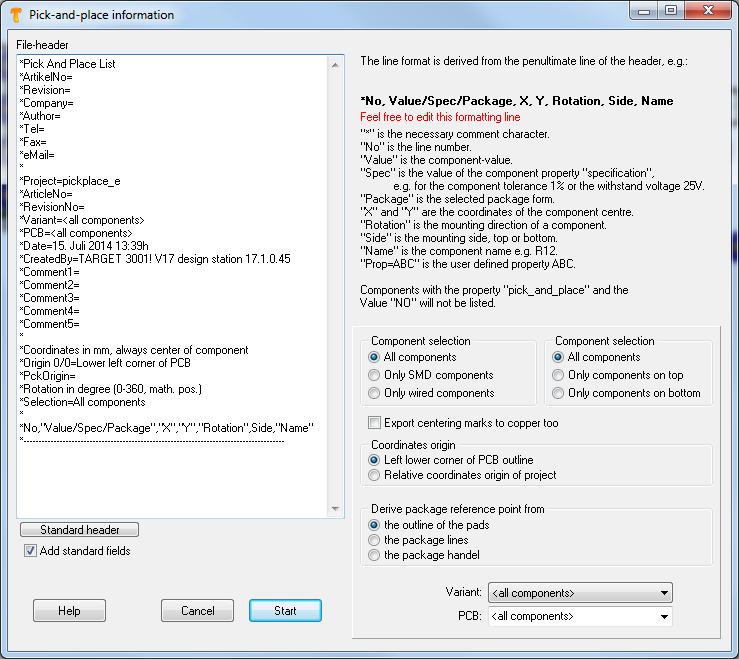
The output dialog "Pick and place" can be found in Menu File / Input/Output Formats / Production / Pic-And-Place automat (pic & place)...

Pick and Place dialog in Menu File/Input/Output Formats/Production/Pic-And-Place automat (pic & place)...
This dialog allows the creation of data on automatic "picking and placing" into a text file. Coordinates are relative to the lower left corner of the PCB. If you however select "Only components on bottom", then the lower right corner is the origin. This is because you should insert the PCB bottom side top into your machine.
TARGET 3001! uses the coordinates of the center of each component being derived from the complete footprint image-outline.
User defined property
Maybe you'd like to put out a certain property of the components to the pic & place list, for example the stock number. Precondition is, that the components in question show this property and a value to this property is given. So add to the last but one line: ,"Prop=STOCKNUMBER"- important is the comma and the quotation marks. In the layout you for example have 5 components in use, furnished with individual stoch mumbers:
In the Pic&Place dialog it looks like that:
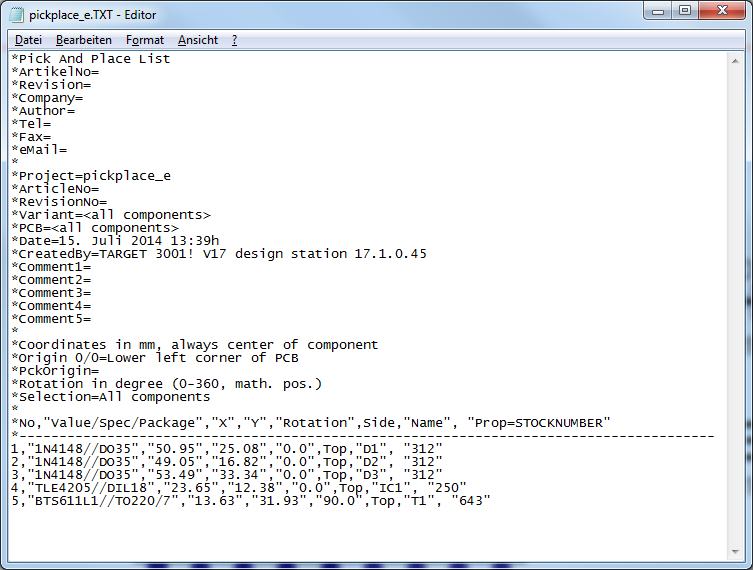
Wenn Sie dann den Startknopf drücken, werden in Ihrem Pic&Place Textfile folgende Einträge sichtbar:

Bild: Die Pic&Place Ausgabe
Hierbei handelt es sich um ein einfaches Textfile, das man mit jedem beliebigen Editor bearbeiten kann. Die gewünschten Lagernummern sieht man in der letzten Spalte.


