Import filters
Read XGerber and Excellon files
TARGET is able to read files containing XGerber and Excellon data for to import those layer by layer into a TARGET project. Select this menu from menu "File/Input/Output Formats/File transfer/Documentations/..." Click on the "Read in" pull down menu and select one of the desired XGerber files for conversion. It is displayed in a line on the left side of the dialog. Choose by ticking the radio buttons which kind of data the selected file contains.
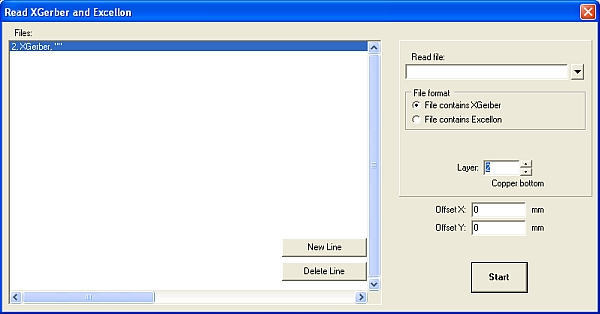
Read Gerber and Excellon files
Basics
Using this tool (File/Input/Output Formats/File transfer/Documentations/...) you can view the Gerber data of your project before producing a PCB. The Gerber data are directly read into a TARGET project. By selecting the PCB layers set visible, the corresponding views can be seen and checked with the TARGET project in separated windows besides each other. Additionally you can import Gerber data from other layout CAD packages and edit those within TARGET. For to read in other formats please pass a detailed description of aperture and drilling list and sample aperture and drilling files out of your system to us. We can create a new tar3001.exe for you quickly free of charge.
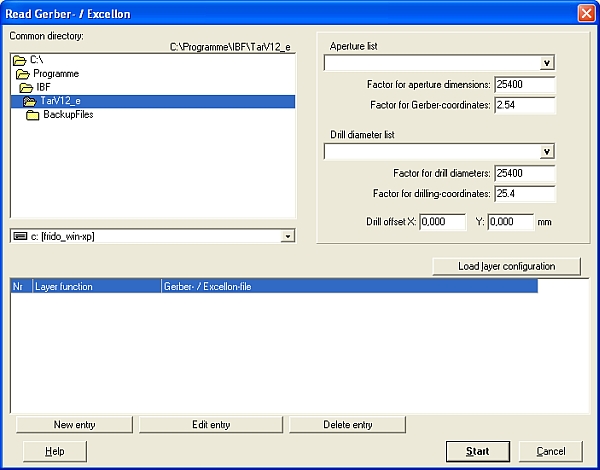
Read Gerber-Files
- Open a new project "PCB without schematic"
- Click on "Read Gerber & Excellon files" in menu File/Input/Output Formats/File transfer/Documentations/...
- Choose your standard directory which contains the Gerber data desired
- Choose the corresponding aperture and drilling list.
- Click on "load layer configuration", if you want to use the existing layer configurations of the TARGET directory, or if you already edited an individual configuration. Here you have the opportunity to open "Gerber configurations" (edited by the Gerber Out function) or "GerberIn Configurations" (edited by "GerberIn")
- Now the dialog opens "Load Configuration". You may enter a new name for the configuration files. Those are saved in ASCII format. *All TARGET supplied configuration files have stars in their file names (e.g. *.BOT for copper bottom). Thus enter an expressive file name regarding to your Gerber file.
- If you cannot use one of the proposed configurations, edit a new one on your own. Drop information which layer (e.g. copper bottom) is to be found in which file (e.g. TESTFILE.BOT)
- Click on New Entry, for to define further layers, e.g. drill_file *.DRL.
- If all settings are made, enter "START".
REMARK: Gerber data concerning the layer "solder stop" should be read in from another layer than "Solder Stop Bottom", because TARGET recognizes the pads of the Solder Stop Layer automatically by activating them in the normal layer dialog. Gerber data of the solder stop layer with topping of the vias are ignored then or dominated by those "recognized".
If the external CAD format you need concerning the aperture and drilling list not is offered by TARGET, please describe it to us (evtl. using an example - file). We add all formats you drop to us into the list as we estimate it reasonable.
Import DXF
Basics
DXF (Drawing Interchange Format) is a data exchange format between different CAD programs of Autodesk Inc. Open it in menu "File/Input/Output Formats/File transfer/Documentations/..."
TARGET 3001! saves all details of schematic and PCB with an internal data structure. The DXF format gives the possibility to make those data being viewed and handled by other CAD programs.
DXF is defined that way that even complicated matters of any programs in any programming language can be generated. The program needs to fulfill two conditions:
- It must be able to read an ASCII-file
- It must be able to load and process numbers as pairs out of this file
Unfortunately the data transfer with DXF is problematic. This refers to the different qualities of different DXF converters:
There is no DXF standard the format has developed organically and still is developing. Additionally as far as we know DXF is not sufficiently described.
All coordinate- and length values of a DXF file are not showing units. The measurement system of a drawing (Millimeter, Inch, ...) is not part of the drawing information itself.
DXF is suitable very good for the definition of lines but suitable very bad for the definition of filled shapes.
Import a DXF-File
Open TARGET 3001! and choose the schematic view if you want to import a DXF-file as part of a schematic.
Open TARGET 3001! and choose the PCB view if you want to import a DXF-file as part of a PCB layout.
Now choose in TARGET 3001! main menu File/Input/Output-Formats DXF Import.
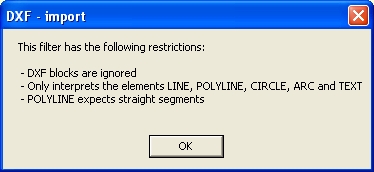
The opening dialog shows few import restrictions. Accept by OK.
Now browse to the *.dxf project which you like to import. Click on "Open".
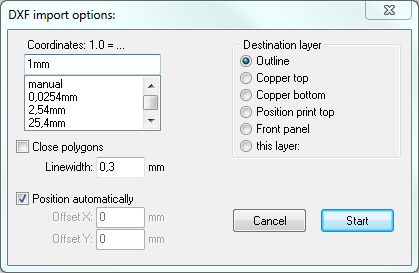
A further dialog window allows the setting of several import options. Set the scaling, define the destination layer and enter to let the polygons show filled. Now press "START" to activate the import.
Export of a DXF-file
Save your project in "TARGET". Open the DXF driver in TARGET 3001! menu "File/Input/Output Formats/File transfer/Documentations/DXF Output...". What you get is:
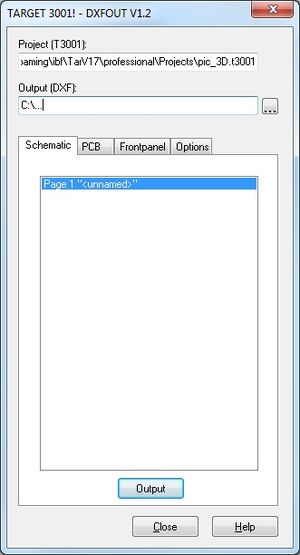
Choose the destination of the dxf-file to be generated by the button ![]()
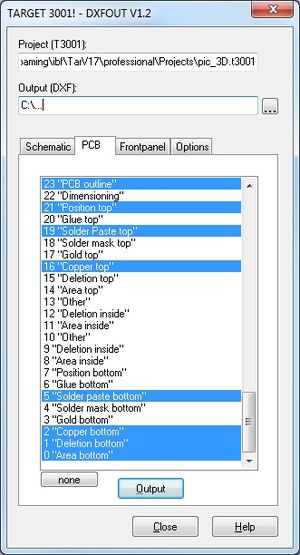
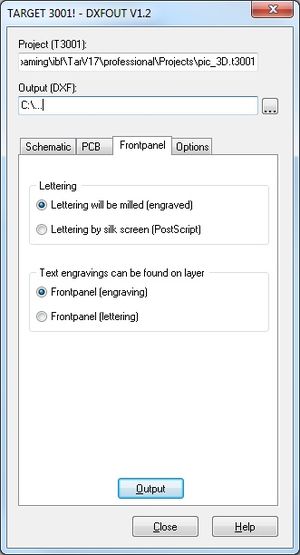
Now select from the registers for several alternatives.
Choose the desired parameters. If you are unsure eg in the Options register, please leave the boxes unticked (default settings are used).
Click on Schematic or PCB and choose the desired page respectively layer.
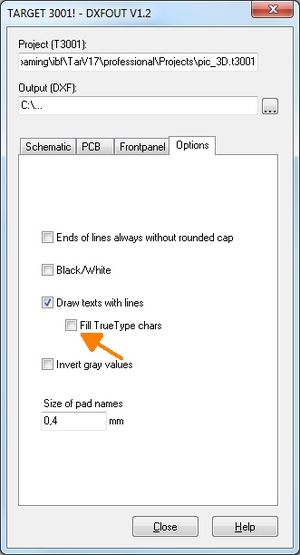
Enter a file name and export your file in DXF format by pressing "Output"
Read Netlist
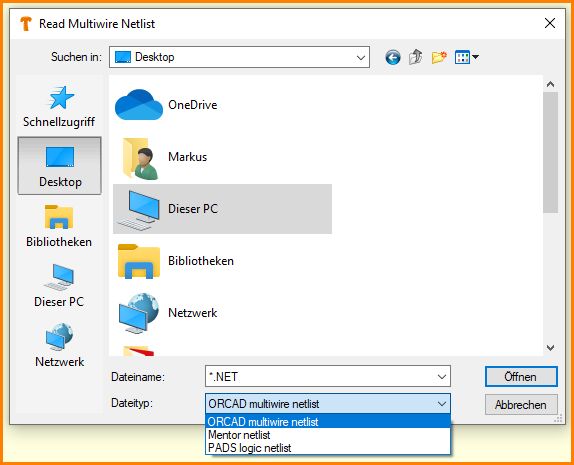
Netlists can be read in "ORCAD-Multiwire", or in Mentor format . This is basically an ASCII-file. To import the netlist, you first need to import all components according to the B.O.M. to your empty project. Then you read the corresponding netlist. The supported read in formats are shown in dialog box "Read Multiwire Netlist" in menu "File/Input-Output Formats/Documentations/Data Transfer/Read Netlist. Open pull down box on the bottom of the mentioned dialog.
Bitmap as a symbol/package
Existing bitmaps of symbols or packages or company logos can be inserted either to your schematic, to your PCB layout or to your front panel. First you need to make your logo a bitmap and to convert it to TARGET 3001! as a symbol (for using it in the schematic) or a package (for using it in the PCB layout or in the front panel layout). The menu option you need is:
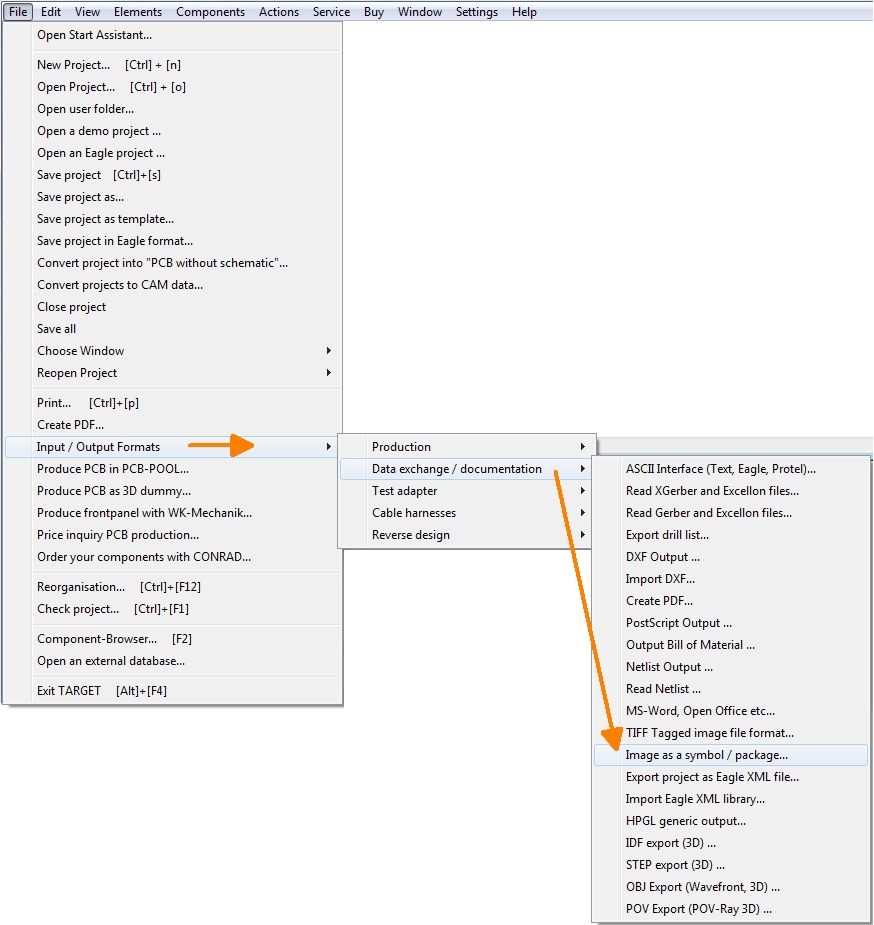
This is the principle Select desired bitmap from wherever you saved it and load it to TARGET 3001!. Afterwards export it to the database. Please make sure that the bitmap isn't too big for your PCB (regarding the size of the file as well as it`s measurements). For details see the following example. It shows how to insert a logo in *.bmp format in order to use it in the schematic (like a symbol) or in the layout (like a package). You also might engrave it to a front panel.
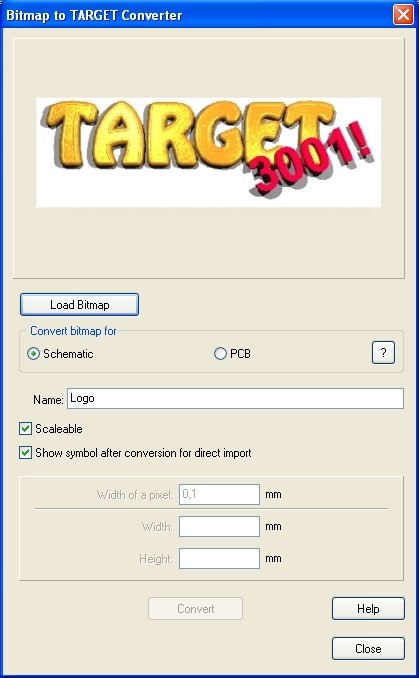
Image 1: The dialog "Bitmap to TARGET Converter". The TARGET-Logo we have inserted already.
Load your desired bitmap from it's genuine directory. Afterwards tick the radio button either to use the image in schematic, layout or front panel. The info box behind the question mark illustrates the matter:
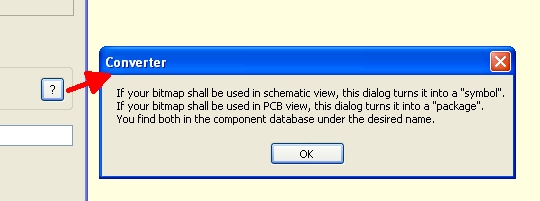
Image 2: The info box behind the question mark
Now give the bitmap a name to save it to the database. Please note not to choose the size of the bitmap too big (file size and measurements). In order to use the image in the schematic or for the front panel print you can use colored images. For layout use it is recommended to use sharp black and white.
Example: You'd like to have a logo 20 mm in width upon your layout. The bitmap would have the measurements of 984 x 312 pixel, like our TARGET Logo has. Load the bitmap and enter 20mm to the width field. TARGET 3001! now calculates the proportional height as well as the needed pixel-width. Also you might enter a certain value for "Hight" or alternatively a value for a certain "Pixel width".
If you would have a smallest track width of e.g. 0,15 mm it would be recommended to choose this value as pixel width. In a relation of 20 mm image width to 0,15 mm pixel width we would have a bitmap of 134 pixels width (20/0,15=134). Use www.irfanview.com to adjust images in size. Convert it to sharp black and white (no values of grey) and save it as a bitmap.
Now use this dialog in TARGET 3001! to convert it and save it to the database. The logo will be saved to the database within a component group of your choice. Now insert it to your designs as you please.

Image 3: Checkboxes
A tick in the checkbox "Scalable" sets the attribute "SCALABLE" true within the component properties. When importing the component later a dialog will appear to adjust the measurements additionally.
A tick in the checkbox "Show symbol after conversion for direct import" avoids a repeated search of the part in the database when intending to import it directly.
Importing a Bitmap to the front panel tool
Regarding the use of a bitmap in the frontpanel tool, you need to consider the following:
Start the engraving tool in menu "Actions" and define the outline. You get 3 new layers placed top of your layer staple (in our case on top of the standard layer configuration):
- 29, Frontpanel (milling) This is where real breakouts and through holes are brought to the frontpanel
- 30, Frontpanel (documentation) This is where you can post internal advice that will not be part of the figure at the end
- 31, Frontpanel (lettering) This is for carving inscriptions to the frontpanel. Letters are cut into the surface and wiped with ink.
Now you must convert your bitmap to a package using this dialog:
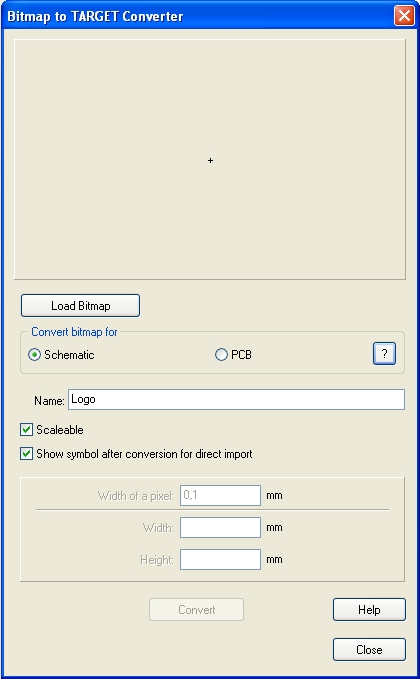
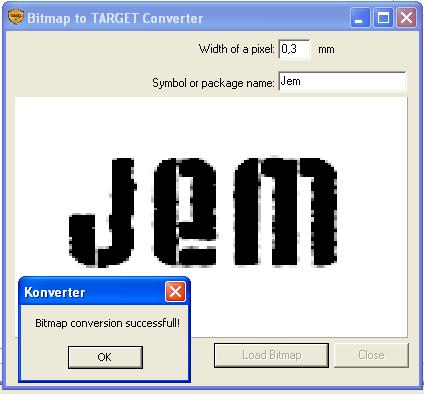
Set the "Width of a pixel" as wide as the drill of the milling machine (0,3mm is a good choice). You are requested to load the bitmap. An example logo is made out of three letters:
Now you have a jem.pck in the library LIBS from where you get it into the canvas:
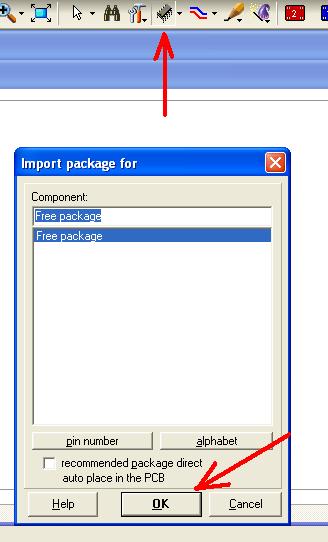
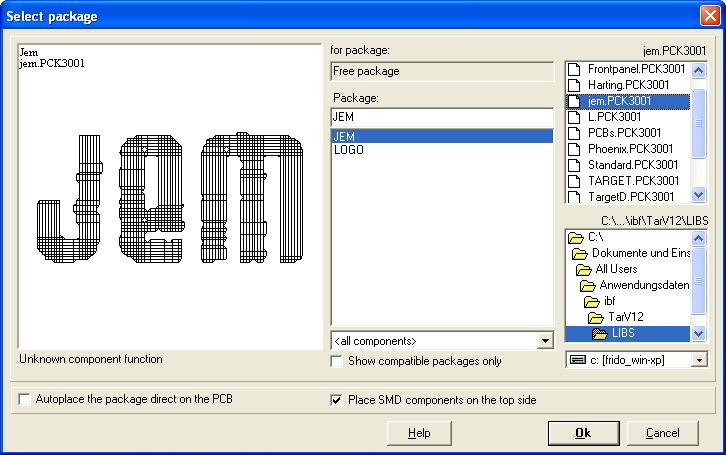
Press OK and get:
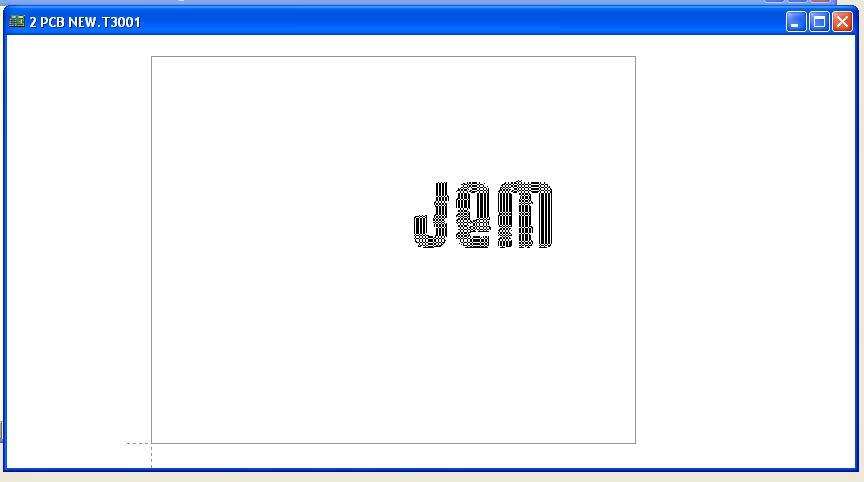
This picture is the phantom hanging on the cursor. If you place it by mouse click, you won't see anything because you have imported a package. This is supposed to be on layer 2, copper bottom. So if you switch it visible, you get it shown in red (which means it is on layer 2, copper bottom).
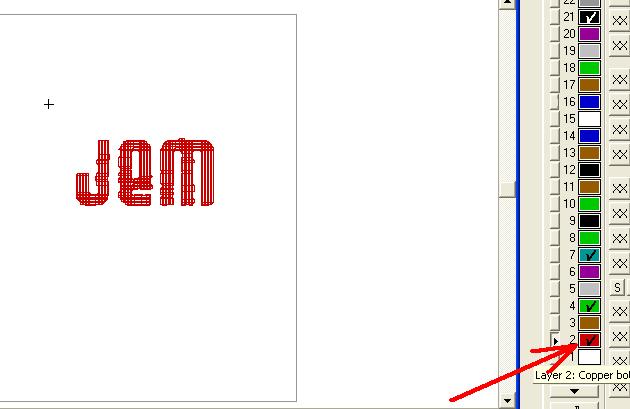
But this is not what we want, because we want it on layer 31 Frontpanel lettering. So we must bring it over there.
Drag a highlighting square over the complete figure and press key [e] for edit. Set the dialog like below and press OK.
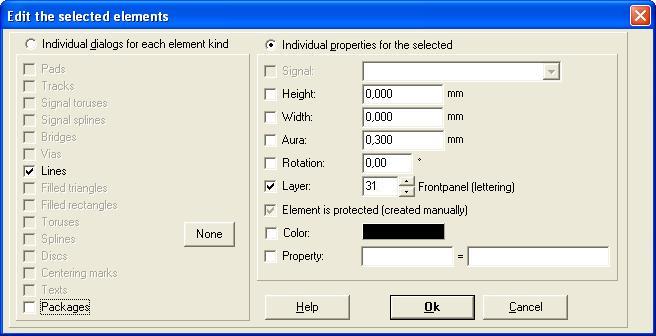
What you get is this:
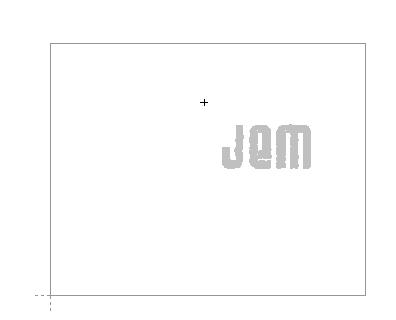
If you double click the figure you will see, that it is on layer 30 which is correct. If you zoom in a bit you will see that it is created of lines. These lines are the trackings of the drill. Sure you can edit them:
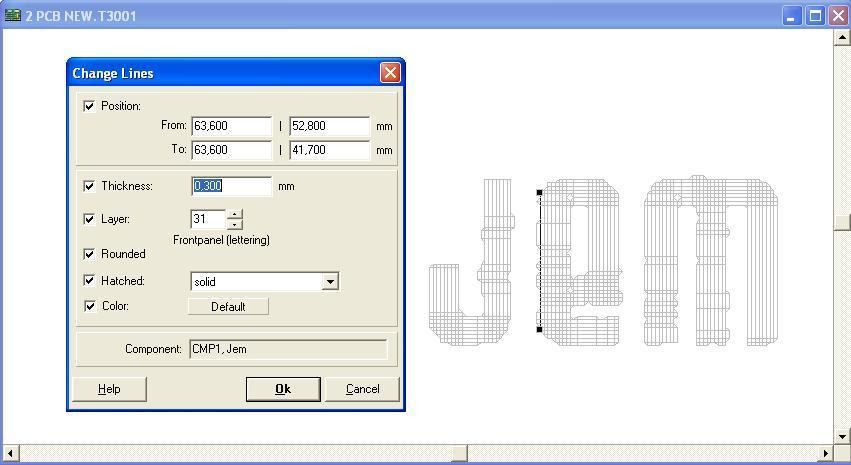
I guess you must play a bit regarding the question of resolution of the bitmap (Pixel) and the diameter of the drill in respect to the size of the logo on your panel.

