Generic symbols
What is a generic symbol?
Some of the simple schematic symbols,

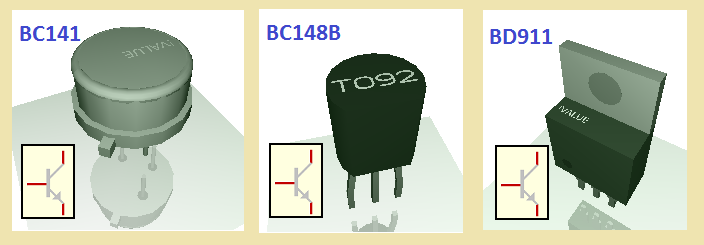
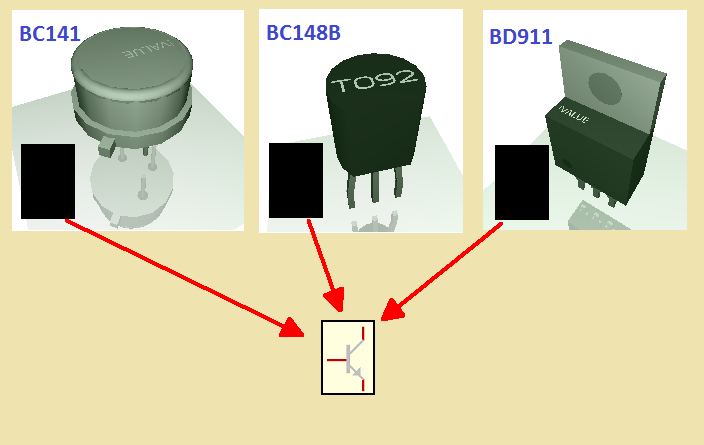
Are used by various components, e.g. the symbol of a NPN bipolar transistor  is used in the components BC141, BC148, BD911 and so on.
Naturally transistors differ in voltage, power and so on while the symbol drawing is the same. It would be possible to furnish each component with an identical symbol but this wouldn't be clever...
- unnecessary consumption of disk space
- big administrative effort. Adaptions of the symbol drawing need to be carried out at every component which uses this particular symbol.
It would be better just to point at one generic centrally maintained symbol "NPN bipolar transistor". Generic means some kind of a default, a specimen, a primitive, a basic form. A generic symbol only comes with a drawing and a name for example "Resistor", "Diode", "Capacitor". It does not have any further parameters.
- few disk space
- low administrative effort. The symbol is there only one and gets centrally maintained
- TARGET components can be furnished with custom made generic symbols
Display that a generic symbol is used
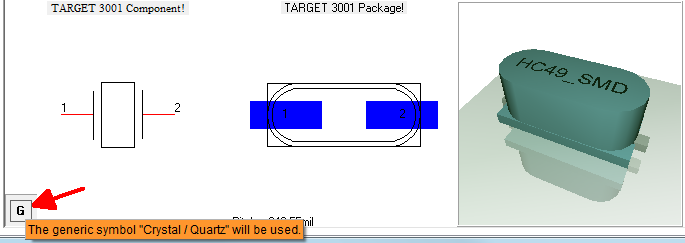
Image: Button G in the component browser
In the component browser some schematic symbols show a button "G" beside the DIN and IEEE switches. This button "G" is not a switch. It only points out that the schematic symbol is a generic one.
G in grey = generic symbol is a genuine TARGET generic.
G in black = generic symbol is from the user
G in red = generic symbol is from the user. It replaces the genuine assignment because of name identity.
Use a generic symbol
With a component new to be drawn
If you create a component newly you automatically will get asked whether to use a generic symbol. You should do so if possible.
The procedure is explained here: Create a new component...
With an existing component
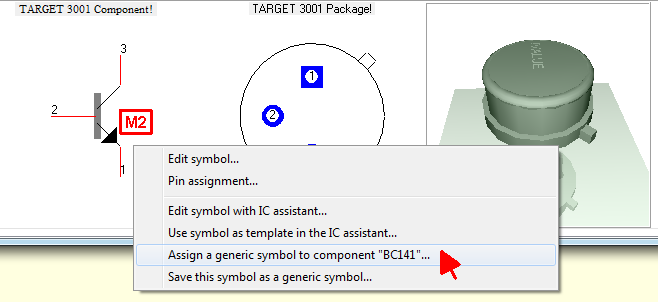
In the component browser click M2 on the component symbol. The context menu opens. Choose menu option "Assign a generic symbol to component <name>"
With a TARGET component
If a generic symbol in TARGET 3001! does not please you, you can create your own generic symbol. A TARGET component, using a generic symbol, can be defined to using a custom made generic symbol, which always preferably will be used. This preference takes place only if the symbol has the same name. The G-box then gets displayed in red.
An example:
You can give your own generic diode symbol the same name like in TARGET 3001!: Diode, or you may give it a different name, for example My Diode. In the first case your generic diode symbol will be used for all TARGET components, in the second case only with your (= user) components. That makes clear that the name of the generic symbol is the crucial aspect.
Care for correct pin assignment. The pin numbers of your diode symbol need to be identical with the TARGET diode.
Administrate generic symbols
Edit generic symbols
Please see component browser menu: "Extra/Edit generic symbols..."
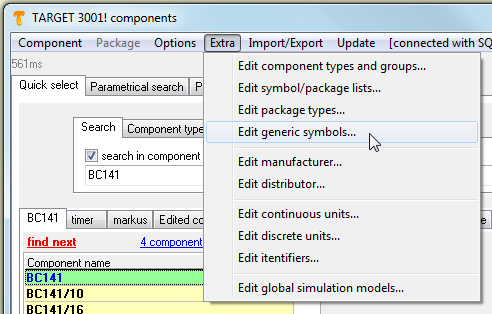
Here you can create a new generic symbol.
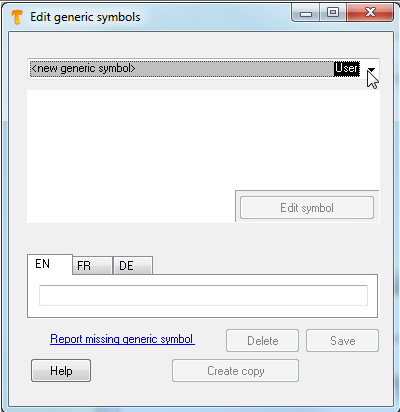
Establish it by giving it a name in the bottom line under EN, which stands for a ENglish naming. Sure you can use FRench or DEutsch as well. Now select its name from the list. You are directed to an empty schematic page. Draw it and save it by highlighting it and pressing keyboard key [x]. It is treated the same way like an existing generic symbol. Generic USER symbols can be deleted by this dialog as well. (alias: Delete generic symbol)
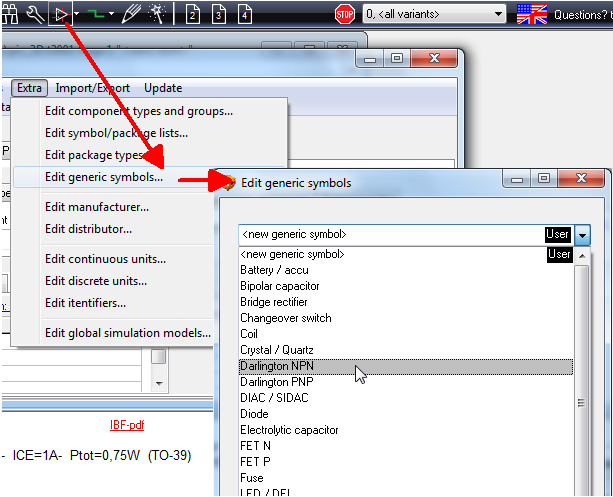
Image: Dialog Edit generic symbols
Save a normal symbol as a generic
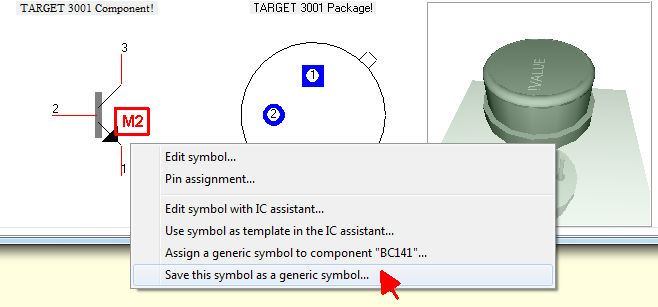
If you like a symbol so that you decide to use it generic, please click M2 on the symbol in the component browser and follow the entry in the context menu...
Pin assignment
If you intend to exchange a TARGET-generic by a custom one having the same name you need to take care for identical pin assignment. If e.g. a "Bridge rectifier" uses a TARGET-Generic symbol which shows its pin numbers 1(+), 2(~), 3(-), 4(~) please assign the pad numbers to your generic according to function.
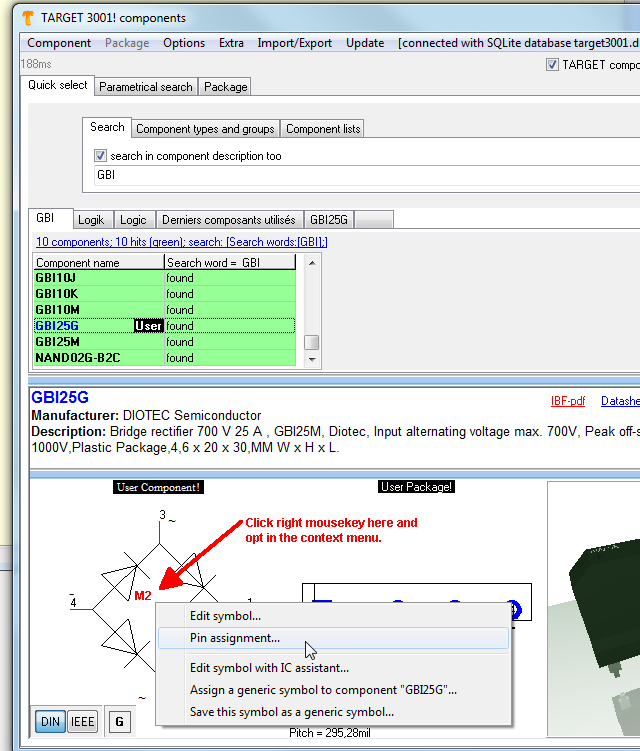
Image: Open the dialog for Pin assignment in the component browser. Select "Pin assignment..."
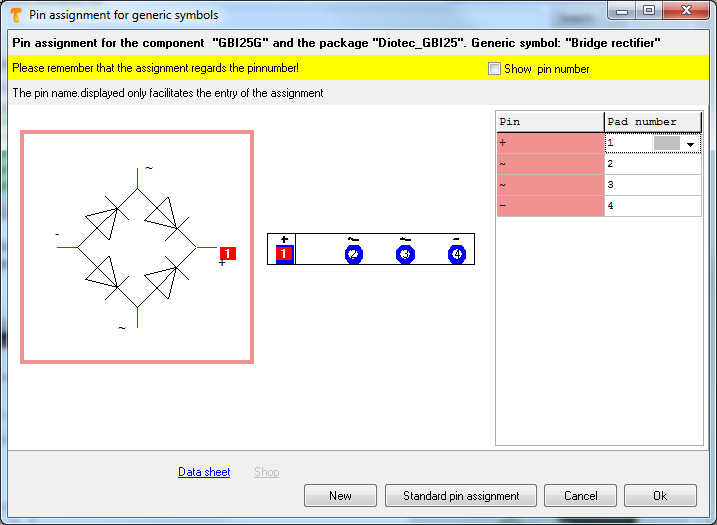
Image: Use the list top right to assign pad numbers to the pin numbers. Watch the pad functions (blue) and assign the pins accordingly.


