MID Tutorial
Start the design on a 3D body
Starting from a schematic in TARGET 3001! you like to place parts and tracks on a 3D body. Pressing the 3D button in the schematic toolbar to the right at this stage delivers an empty canvas because you first need to import a 3D construct. In menu "Actions" please use item "Prepare MID...". A browser opens to select a STEP file in Format *.stp which delivers the body to design on. You should have a 3D object in STEP format at hand to design on. In TARGET itself such a 3D body can not be constructed. For a later opening of the 3D-view press the 3D-button in the schematic toolbar top right.
Import the 3D body as a STEP file
After the browser opens, select the desired STEP file and the figure will immediately appear in the editor. If you need to correct the alignment, double-click the syntax line in the lower part of the window. In the opening dialog "Load and edit STEP data" the object can now be tilted around the respective axes or moved along the respective axes.
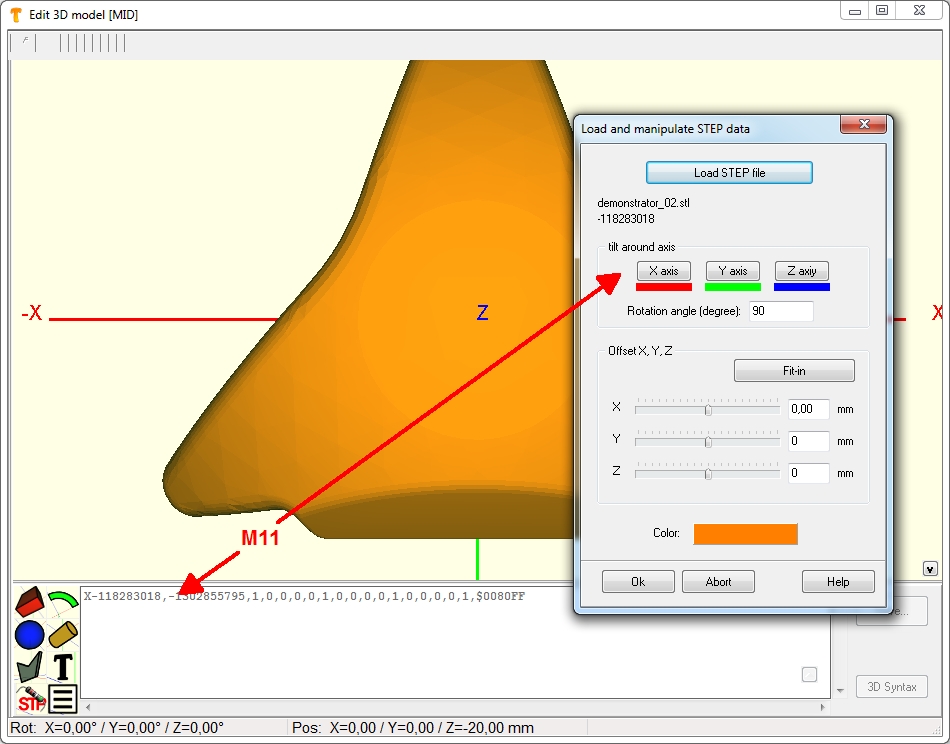
Image: After the alignment of the body is done, please confirm the dialog by pressing OK.
Close the dialog so you automatically are forwarded to the window to edit the design the electronics to the body.
Rotation, Position, Dimension
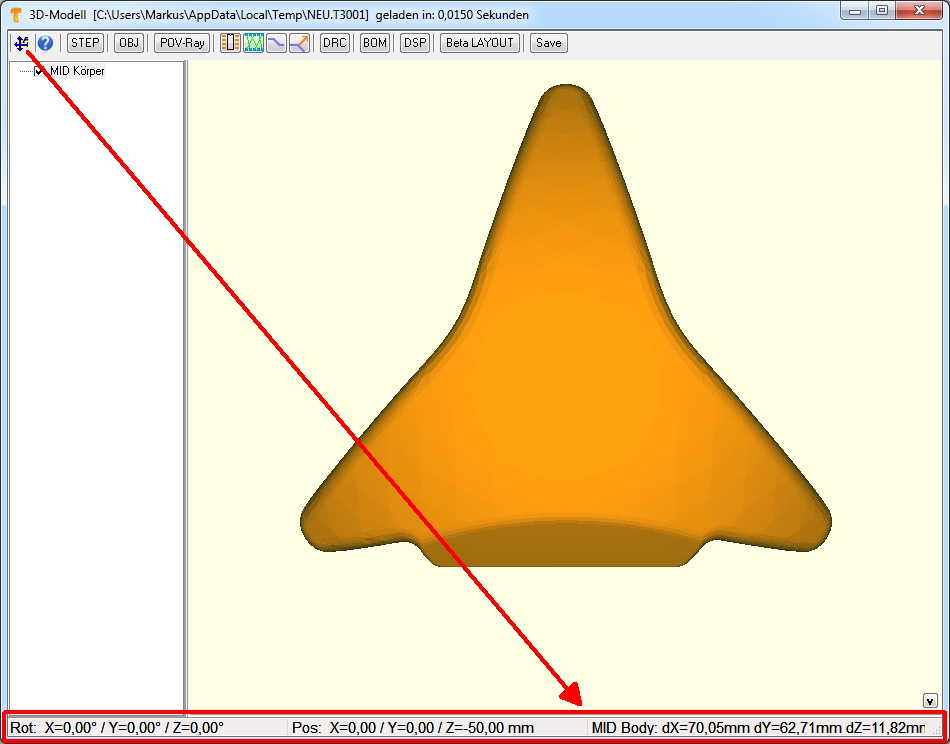
The rotation, the position as well as the dimension of the body is shown in the status line at the bottom of the editor window. Click on the Icon to get the standard orientation of the body (top left in the editor).
What heppens in the 2D layout view meanwhile?
In the TARGET 3001! 2D layout view now a handle cross of a component will be placed to the 0|0 origin. It represents the 3D object to be seen in the 3D view. If you like to delete the imported 3D body you need to delete this handle cross in the 2D layout view. A double click on this handle cross demonstrates that the properties of that particular package show the entry IS_MID_COMPONENT having the value TRUE.
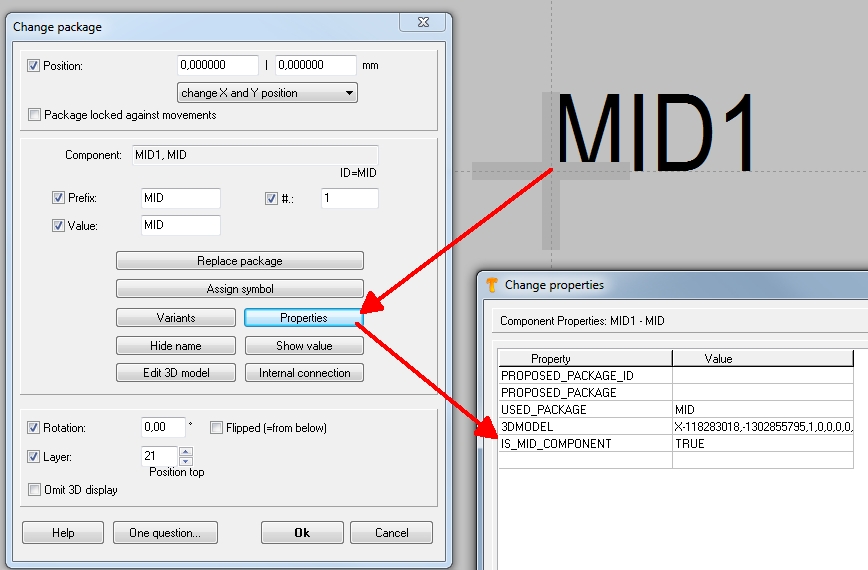
Image: In the 2D layout view a special package is "prepared". This happens automatically. No need to do anything for the user.
What we have here is a kind of plastic cap to which we'd like to apply electronics according to our schematic.
To the left we see all signals as well as all components being determined by the schematic. The related package proposals are recognized in the background.
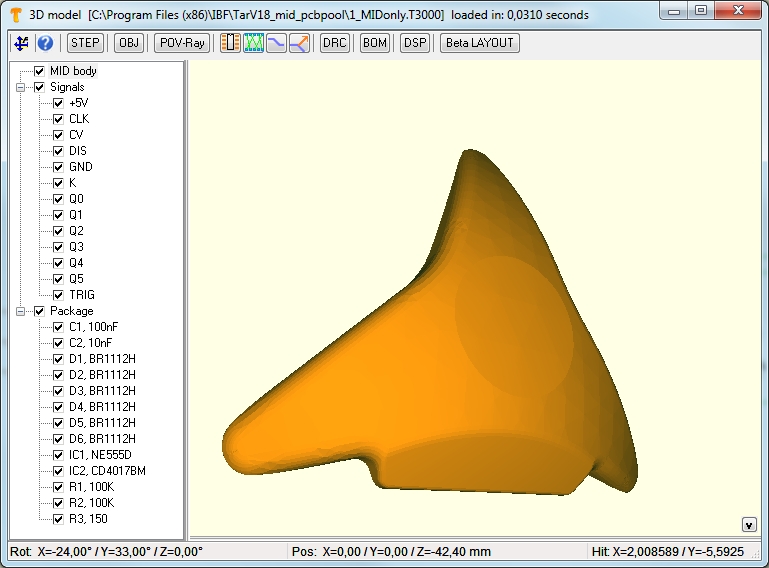
Image: The 3D view shows a body to which the components and tracks shall be designed.
Place a component upon the surface of the 3D body
Use button ![]() to place a component package to the body. The cursor image changes
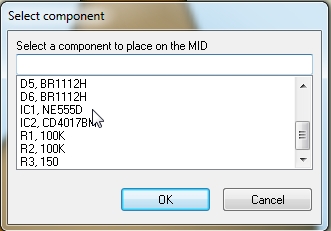
to place a component package to the body. The cursor image changes  and you move it to the spot where the center of a package shall be placed. A click makes a list pop up to select the desired package.
In our case we select IC number one which is a NE555D timer.
To delete a package from the 3D body just klick the center of the package in order to highlight it and press keyboard key [Del].
Rotate a placed component by degrees
Immediately it gets placed and a further dialog allows rotation by degrees.
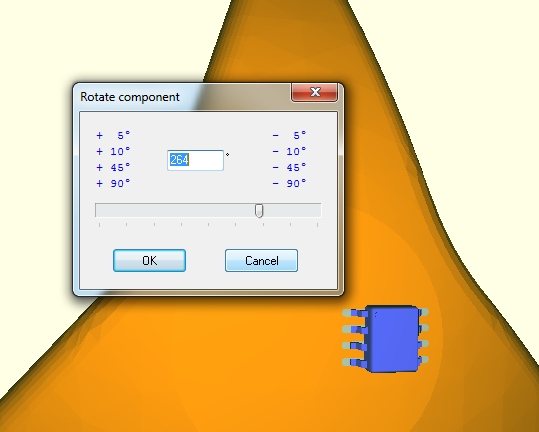
Image: Package placed, turn eventually. This package is highlighted at the moment. That's the reason why it is blue.
Positive turn means counter clockwise, negative means clockwise. You also might enter degrees here individually. OK closes this dialog. Now that we are still in the mode to place parts, we just hover to the next position. The same here. Fist click the desired spot, then select a part from the list. We select IC number two and place it. Again we can rotate the part. You can make this dialog pop up at any later time. Please highlightthe part and press keyboard key [t] for "rotate".
Move a component, a dapt its position
If the position might need a better placement so we highlight the part by a click to its center, move the cursor to the desired spot and press keyboard key [d] to "displace". Immediately the package moves its center to the new spot, defined by the cursor tip. If the new place should not have the same inclination in space, you again might need to rotate it a bit. Repeat this action if needed.
Component is elevated a bit
If you rotate the body you will see that the tips of the leads are elevated a bit. These zero point two millimeters are OK and covered by the constructional process. It can be set in the Design Rule Check (DRC) dialog.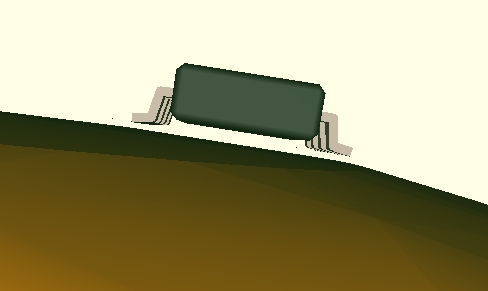
Image: Component elevated
Calculate the air wires
Use button: ![]() For these two parts we'd like to see the connections coming from the schematic. Creating the air wires gives information which connections now need to be routed. For a better view we fade out the packages for a moment. Untick the box (arrow). It is recommended to recalculate the air wires from time to time.
For these two parts we'd like to see the connections coming from the schematic. Creating the air wires gives information which connections now need to be routed. For a better view we fade out the packages for a moment. Untick the box (arrow). It is recommended to recalculate the air wires from time to time.
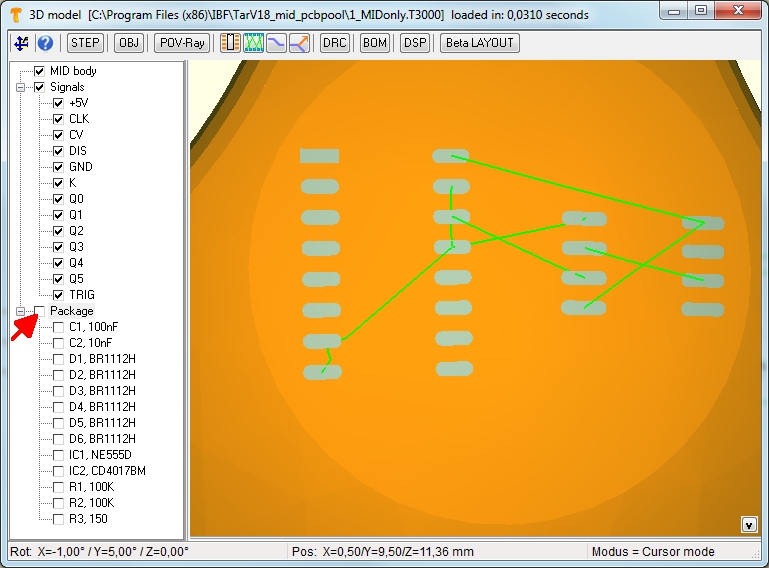
Image: Air wires calculated, the bodies of the two faded out
We look at the diagonal connection to the right we now would like to rout.
Place tracks
We use the button to place a track ![]() while instantly the cursor changes
while instantly the cursor changes ![]() If we come close to a pad a little snap on-box appears helping to meet the connection right.
If we come close to a pad a little snap on-box appears helping to meet the connection right.
Such a snap on box only appears at pads which have a signal being defined in the schematic. Pads with no signal don't show a snap on box.
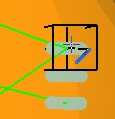
Image: Snap on boxes in mode "Place tracks"
A click on the pad starts the track. The width of the track in black and its spacing in red are determined by the signal characteristics in the schematic.
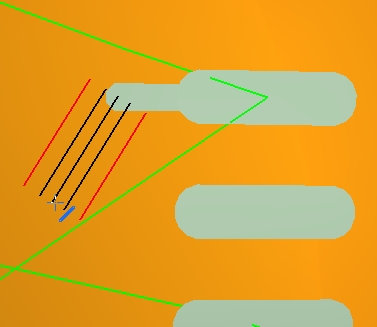
Image: Snap on boxes in mode "Place tracks"
Each click places a piece of track. If you didn't manage to place the track neatly you can correct the route later. It is good to click often in order to create many little segments, easy to adapt lager to a smooth route. At least we arrive at the destination pad.
With [ESCAPE] you release the cursor from any mode and return to pointer mode.
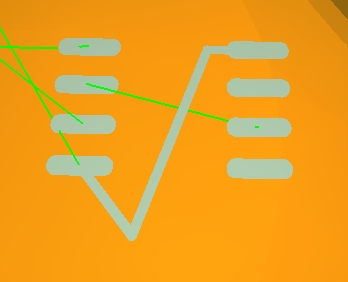
Image: Placed track, needs to be adapted a bit.
Highlight a set of track segments
This happens with click on the first and last segment of a whole track together with the [Shift] key. Now the whole track can be edited or deleted.
Drag the corner of a track
Now we'd like to adapt this corner by dragging it into shape. Use the drag corner mode ![]() do a simple click to the corner while the image of the track segment changes. Now just move the mouse without key action
do a simple click to the corner while the image of the track segment changes. Now just move the mouse without key action
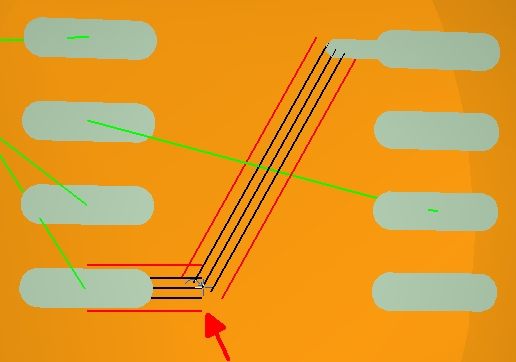
Bild: Enfachklick und lediglich die Maus bewegen.
If you have found the position just place it by a single click. You still can adapt the width of a track. Highlight it and press keyboard key [e] for edition.
We change the track width for example to zero point one millimeters. This will cause an error later when we start the design rule check.
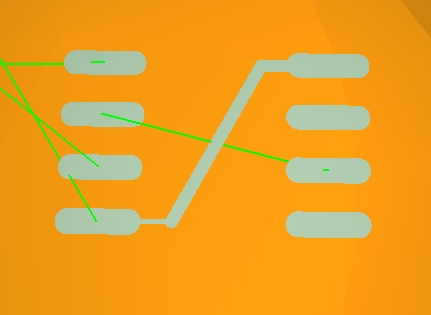
Image: Placed track. The air wire vanishes as soon as all airwires are calculated new (on button click.)
Also spacing violations: How to check them and how to correct them? So here we deliberately cause a spacing violation by placement of the track too close to a neighboured pad.
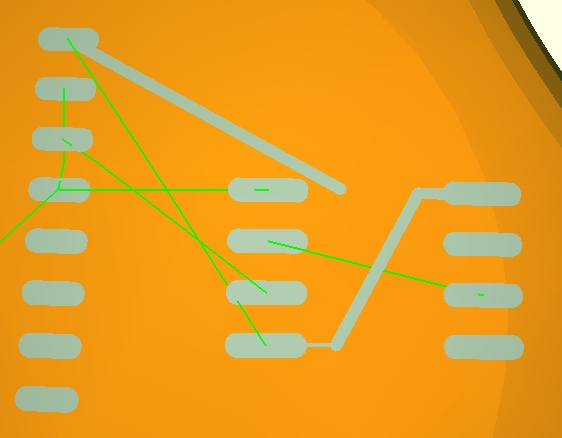
Image: The track above possibly will come too close to another, at the lower connection maybe the track is too thin...
Place a via
in the current version, TARGET can also place vias on MID bodies. When routing a track, press the [.] key to place a via at the end of the track:
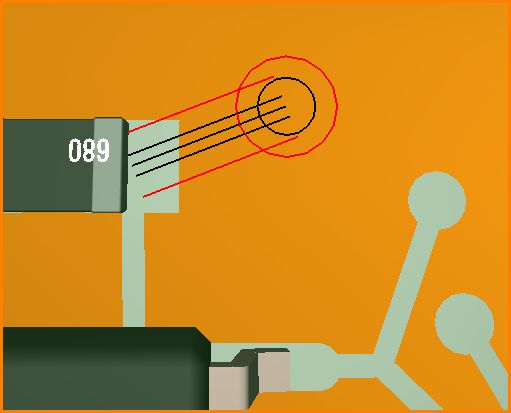
Image: Via at cursor tip
When clicked, the via is placed and the track continues on the backside. TARGET gives an alarm if the backside would be too distant (material too thick at this point) and if the back surface would not approximately have the same orientation.
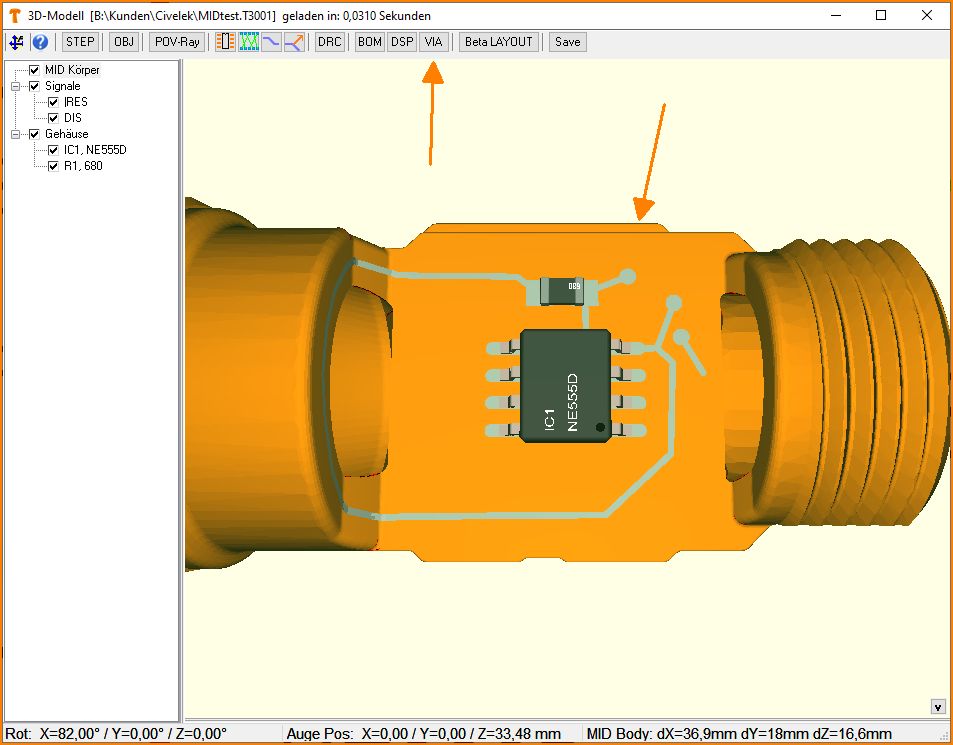
Image: Vias placed
The vias now can be output as a list to a text file by clicking the [VIA] button:
;TARGET 3001! MID Vias Information V30.4.0.37
;MIDtest
;09.Jul.2021 11:05
;Unit=mm
;Signal;X1,Y1,Z1;X2,Y2,Z2
;-----------------------------------------------
RES;4.99,0.95,-3.91;4.99,-0.95,-3.91
RES;5.29,-0.95,-2.29;5.29,0.95,-2.29
DIS;2.84,0.95,-5.19;2.84,-0.95,-5.19
EOF
The signal name is listed for each via as well as the start and end coordinates in the space around.
Design Rule Check
Now we start DRC the design rule check. It checks whether all components are placed, whether all signals are routed, all pins touch the ground with a certain tolerance given.
Also the width of tracks as well as spacings and schort circuits can be checked. When it is started it shows some packages missing as well as airwires left which is clear to us. But at the bottom of the list we see the hints "Segment too thin" and "Spacing violation" and this is what we have caused.
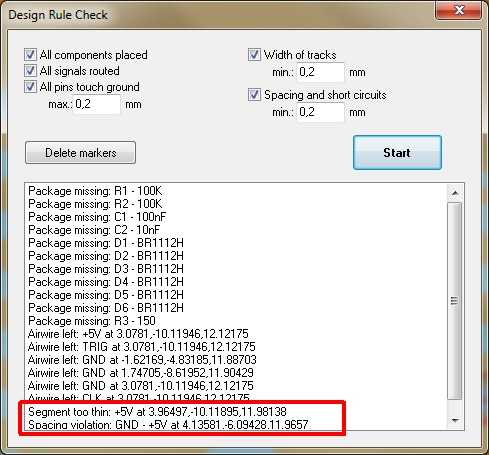
Image: The Design Rule Check in our example.
Every error is represented by a marker. Each one can be clicked to get information what it stands for. If clicked, the element in question is highlighted. Pressing keyboard key [e] allows to edit it. The same with the spacing violation. Since it has no corner to drag it is best to delete it and to draw it new.
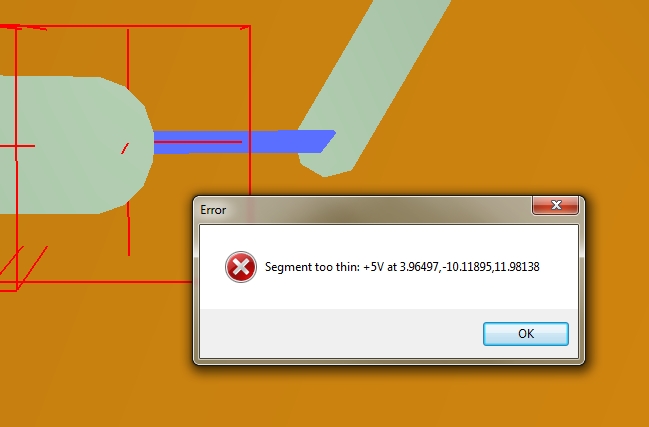
Image: Click on a marker explains the error. Clicking OK highlights the element in order to edit it by [e].
Error markers can be deleted by the DRC dialog.
If all parts and tracks are properly placed, you may come to something like that (below). Any part can be deleted at any time, any track can be adapted at any time. You always have the schematic in the background. So any change of the electronic logic in the schematic can instantly find its consistent representation on your 3D construct.
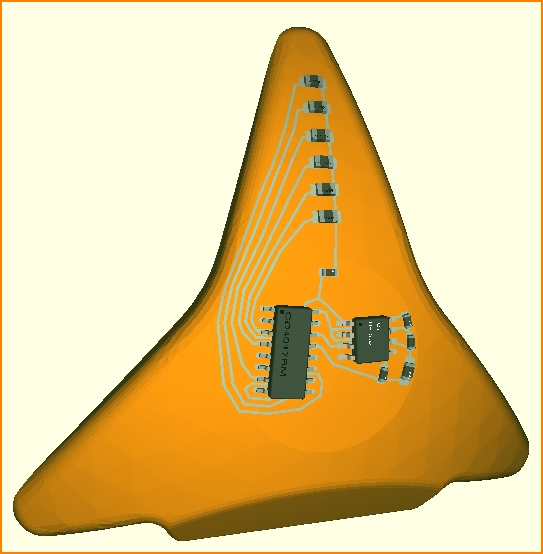
Image: Layout, ready for manufacture (body as well as assembly).
Create STEP format
To produce it you just would export all to a STEP file to hand it over to the manufacturer of your choice. ![]() Sure you can produce it yourself. The STEP format is industry standard.
Sure you can produce it yourself. The STEP format is industry standard.
Bill Of Material
Regarding the assembly you first might want to have a lok at the Bill Of Material (BOM). It is a simple text file which can be read by any text editor giving any opportunity for formatting. All components in use are listed as well as their orientation angles including azimuth and zenit angles.
Image: The Bill of Material, BOM
Dispenser information
The same with dispenser information (Button DSP) in order to apply the solder agens to the pads. In addition to the name of the component all its pad coordinates are listed.
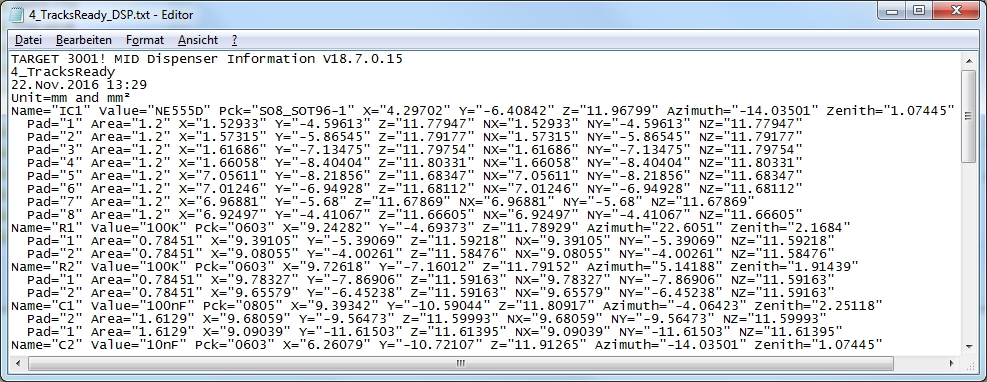
Image: Dispenser information as text file
Order the project as a completely manufactured and assembled part
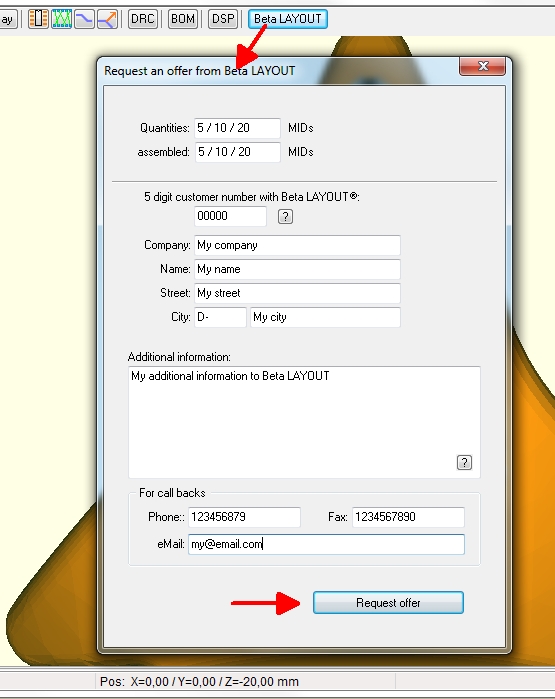
If you want to order the completely produced and assembled part as a whole, just click the Beta LAYOUT TAB to request an offer from there. You only need to define the quantity, enter your personal data maybe give some additional instructions and press the "Request offer" button. An eMail is sent to Beta LAYOUT having your file appended and you will have an answer soon.


