Gallery
Contents
Gallery setup
The tab Gallery is new in the component browser since version V16.x.x.xx. It offers an alternative for searches by words and values simply by using images. Often you don't know a certain name of a component but you have an idea how it looks like. Now the gallery is your tool. It consists of an image part (top) and a text part (below). A gallery image is nothing more than a predefined search which brings you close to the component type in question. Later you may narrow your search. In this respect a gallery image represents a predefined search request.
Image area
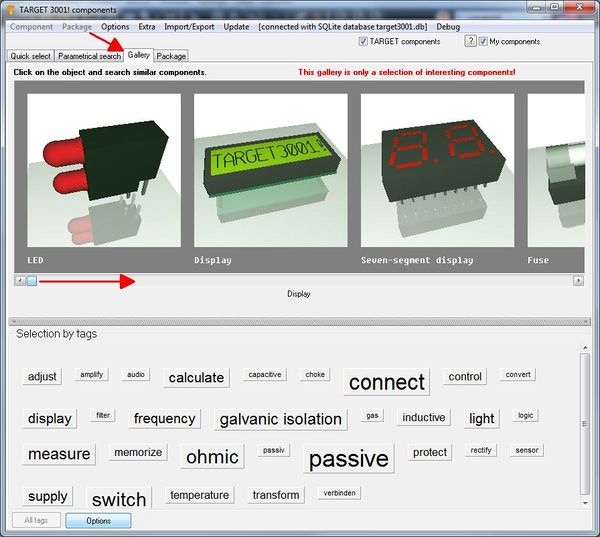
Image: The gallery.
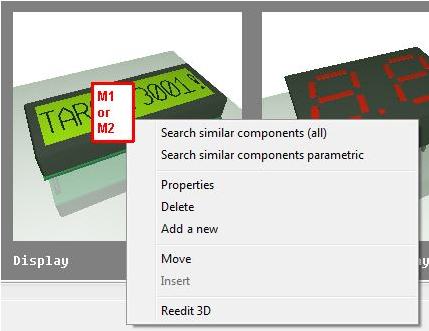
Similar parts are subsumed under representative images. A click on a gallery image opens a context menu with the following options:
Search similar components (all)
This option opens the component browser and lists all those parts represented by the gallery image. The default images deliver component types, for example LED, Display, Segment. You can define individual gallery images to which you can assign individual search routines, see.: "Add new".
Search similar components (parametrical)
This option opens the parametrical search at the desired component type. Now enter additional parameters in order to narrow your search.
Properties
Every gallery image represents a certain search demand. Some gallery images are given by TARGET 3001!. You can not change them. others might be added by yourself see: "Add new". You can add properties to your gallery image for example the name or additional information. Both appear under the image. Also you can furnish a gallery image with a number of tags which then will appear in the text area.
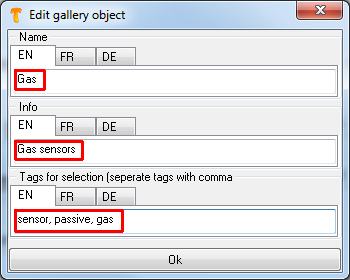
Image: Properties of your own gallery image.
Delete
Only self created gallery images can be deleted. Deletion is quick - there are no questions and no dialogs to confirm. But with the same speed you can create new gallery images representing a certain search demand, see next chapter.
Add new
This option makes the image of a 3D coordinate system appear in your gallery. It is titled <New>. At the same time the following dialog opens where you can define its name, enter further information and tags for easier selection:
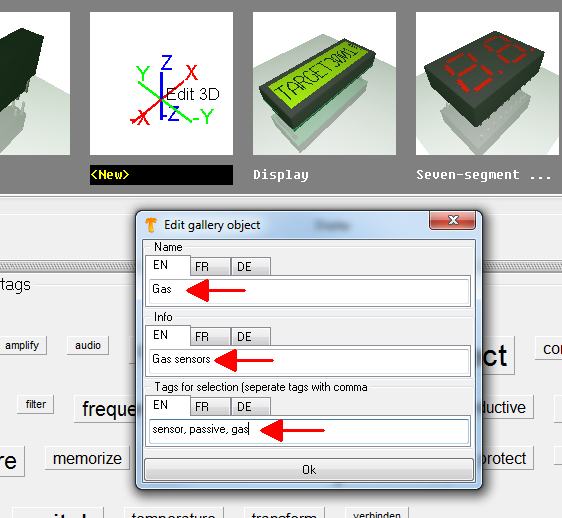
Image: Define properties when creating a new gallery image.
After the appropriate words are chosen press the OK bar below. Immediately the terms are overtaken and a dialog opens:
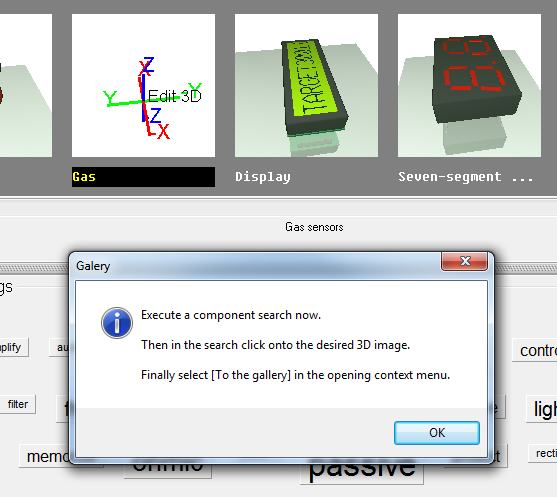
Image: A gellery image can be self made in three short steps.
Now do a "search", parametric or quick search. The result of this particular search now is assigned like a default to the new gallery image. In our case we look in the quick search for the term "gas" in order to subsume gas sensors to the gallery. Select a gas sensor with a nice 3D image and click on the 3D image right below in the component browser.
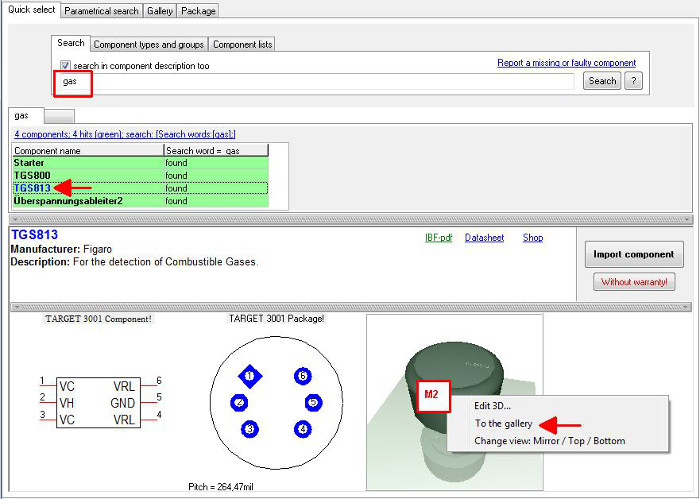
Image: At the end of the process the search demand and the designated 3D image are overtaken to the gallery.
A dialog confirms the fact that a new search demand together with a 3D image is assembled to the gallery.
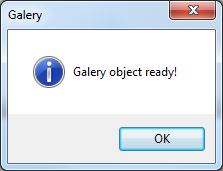
Image: The creation of a new gallery object is done.
Now we switch over to the gallery and immediately see the result. For the fact that it is a self made gallery image its name is highlighted black.
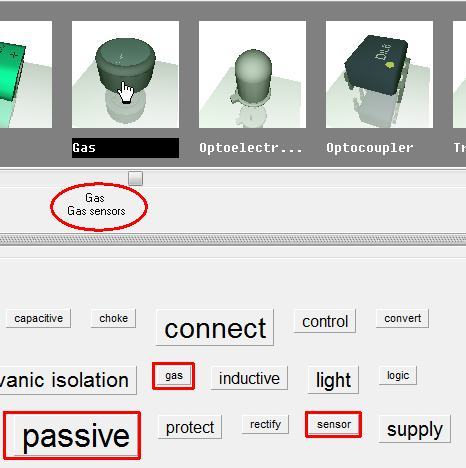
Image: The new gallery object. Oval: Name and information: Square: The tags, to which the image (= this particular search demand) is assigned.
Displace, move
In order to move an image in the gallery please click it and use this menu option. Now click on the image prior to which the image in question shall be inserted. Now press the option "Insert".
Insert
In order to move an image click it and select menu option "Displace, move". Afterwards click on the image prior to which the image in question shall be inserted. Now use function "Insert".
Text area
In the text-area (lower half of the dialog), see various terms which outline the component functions. Je größer das Wort ist, umso mehr Galeriebilder verbergen sich dahinter. Wie im Abschnitt "Neues einfügen" erklärt, kann jedes Galeriebild mit mehreren Begriffen etikettiert sein. Ein solches Etikett nennt man Tag. Wie häufig gleiche Tags insgesamt verwendet werden, sieht man an der Größe des Wortes. Das Wort "passiv" zum Beispiel ist ziemlich groß. Das bedeutet, das viele Galeriebilder das Tag "passiv" haben. Wenn Sie ein Wort klicken und andere Wörter bleiben schwarz, können diese hinzu geklickt werden, damit sich die Auswahl verfeinert. Beispiel: Sie klicken auf das Wort "passiv". Sofort wird dieses blau und die Anzahl der Galeriebilder reduziert sich auf die "passiven" Bauteile. Gleichzeitig bleiben andere Wörter schwarz, z. B. das Wort "einstellen."
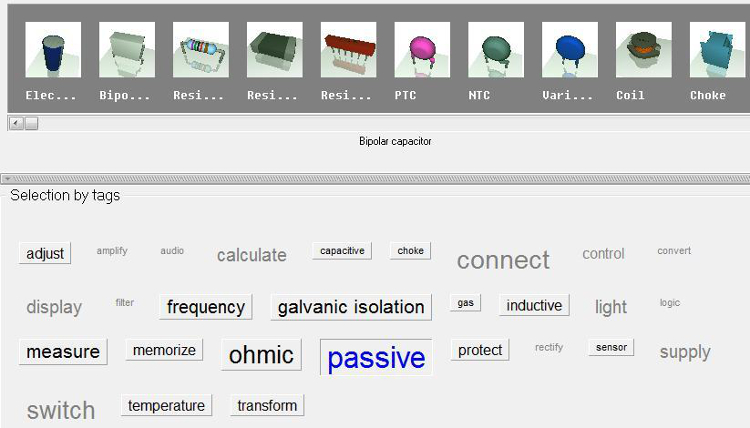
Image: Die Galerie der passiven Bauteile
Wenn Sie jetzt das Wort "einstellen" hinzu klicken, zeigt die Galerie "passive" Bauteile, mit denen man etwas "einstellen" kann. Ergebnis:
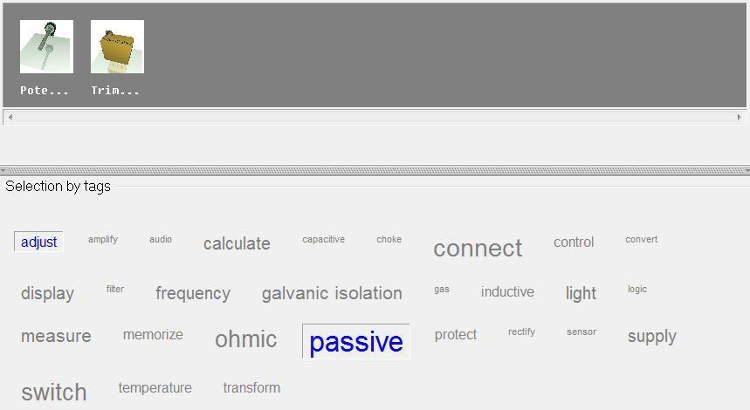
Image: Galerie der passiven Bauteile und derer davon, die etwas einstellen können.
Hintergrund ist, dass Potis und Trimmpotis unter anderem mit den Tags "passiv" und "einstellen" versehen sind.
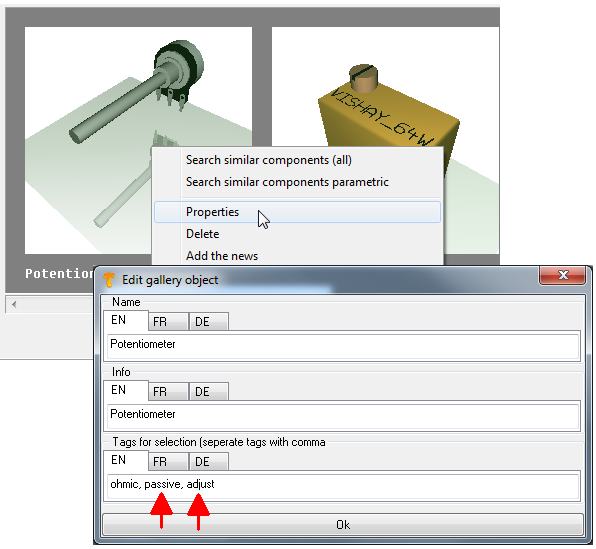
Hinweis: Sie können diese Bild nicht selbst erzeugen, da Sie keine TARGET-Galeriebilder bearbeiten können. Nur eigene.
Klicken Sie direkt auf ein anderes graues Wort, so wird die Galerie gemäß dieses Tags neu aufgebaut. Will man alle Tags brücksichtigt haben, drückt man unten links auf den Knopf: "Alle Tags" und der Ausgangszustand ist wieder erreicht.
en:Gallery


