Create and save a milling pattern: Difference between revisions
Created page with "This article currently is under construction.<br><br> Construct your own milling pattern for use in front panel design in principle like a component package:<br><br> *Draw o..." |
No edit summary |
||
| (6 intermediate revisions by the same user not shown) | |||
| Line 18: | Line 18: | ||
First set the grid to 0.1mm, a tenth of a millimeter. Select the open rectangle from the drawing functions (pencil icon). Hover on the color field of the plane ''29, Front panel (contours)'' and click with the right mouse button. This layer is now activated for drawing. Roughly draw a rectangle around the coordinate origin. Double-click on one of its lines and define width and height 32 x 23 mm. At the same time, assign the coordinate origin to the center (upper part of the dialog).<br><br> | First set the grid to 0.1mm, a tenth of a millimeter. Select the open rectangle from the drawing functions (pencil icon). Hover on the color field of the plane ''29, Front panel (contours)'' and click with the right mouse button. This layer is now activated for drawing. Roughly draw a rectangle around the coordinate origin. Double-click on one of its lines and define width and height 32 x 23 mm. At the same time, assign the coordinate origin to the center (upper part of the dialog).<br><br> | ||
[[Image: | [[Image:Fraesbild1_e.jpg|none]]Image: Rectangle with coordinate origin in the center | ||
<br><br> | <br><br> | ||
Move the mouse pointer to the upper left corner of the rectangle and press the [+] key to exactly hit the coordinates of the corner point. Press Return and then press the [g] key to "dra<u>g</u>" the corner point inwards. Do not use the mouse for this, but rather the arrow key on the keyboard. So you stay at the same height and move on the grid only to the right. Look at the coordinates in the status bar at the bottom of the window. When you have reached -10|11.5, press Return.<br><br> | |||
[[Image:Fraesbild2_d.jpg|none]]Image: | [[Image:Fraesbild2_d.jpg|none]]Image: Drag corner inwards | ||
<br><br> | <br><br> | ||
Do the same with the right corner.<br><br> | |||
[[Image:Fraesbild3_d.jpg|none]]Image: | [[Image:Fraesbild3_d.jpg|none]]Image: The trapezoid might look like this now. | ||
<br><br> | <br><br> | ||
If necessary, round the corners by selecting a line and right-clicking on one of the black end boxes to open the context menu. Here you have the option "Round corner" and then the dialog for dimensioning the rounding follows.<br><br> | |||
Now set the two 3.1mm diameter holes to the right and left of the trapezoid. You can either use the "Draw open circles" from the drawing functions or the hole from the sidebar on the left. Any existing sidebar milling pattern can be used as required. The same applies to text, which you should place on layer 30: | |||
<br><br> | <br><br> | ||
[[Image: | [[Image:Fraesbild4_e.jpg|none]]Image: Drills placed, text prepared... | ||
<br><br> | <br><br> | ||
[[Image:Fraesbild5_d.jpg|none]]Image: | [[Image:Fraesbild5_d.jpg|none]]Image: The trapezoid with drills | ||
<br><br> | <br><br> | ||
Highlight the whole drawing and move the mouse to the position where you would like the handle cross to appear, say on the coordinate origin (could be placed elsewhere as well). Press keyboard key [x] to save. Confirm the following dialogs. Select ''Frontpanel'' as component type and assign a meaningful name to it. We had choses Trapez_32/20/h23. Now save it. If everything is OK, just close the appearing dialog to do eventual amendments. If you would find a bug, fix it now and save again. Close this dialog since it pops up again. The milling pattern vanishes from the drawing canvas into the component database, where it can be found by its name being component type ''Frontpanel''.now itis ready for use... | |||
<br><br> | <br><br> | ||
<br><br> | <br><br> | ||
[mailto:target@ibfriedrich.com?Subject= | [mailto:target@ibfriedrich.com?Subject=Create_and_save_a_milling_pattern I got a question at this point] | ||
<br><br><br><br> | <br><br> | ||
<br><br> | |||
[[fr: Créer et enregistrer un modèle de fraisage]][[de:Ein Fräsbild zeichnen und abspeichern]] | |||
Latest revision as of 16:25, 25 July 2019
This article currently is under construction.
Construct your own milling pattern for use in front panel design in principle like a component package:
- Draw on plane 29, Front panel (contours)
- Use the standard drawing functions
- Write comments on level 30, front panel (documentation). They are not milled or engraved.
- Highlight all and use keyboard key [x] to set a handle cross.
- Select front panel as component type
- Give it a meaningful name
- Save it, done
An example: You want to create a trapezoidal excavation with two drill holes on the right and left.
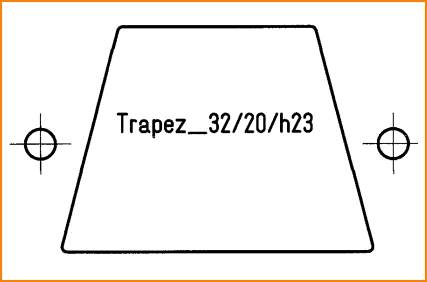
Image: base side=32mm, opposite side=20mm, height h=23mm, hole diameter=3,1mm
First set the grid to 0.1mm, a tenth of a millimeter. Select the open rectangle from the drawing functions (pencil icon). Hover on the color field of the plane 29, Front panel (contours) and click with the right mouse button. This layer is now activated for drawing. Roughly draw a rectangle around the coordinate origin. Double-click on one of its lines and define width and height 32 x 23 mm. At the same time, assign the coordinate origin to the center (upper part of the dialog).
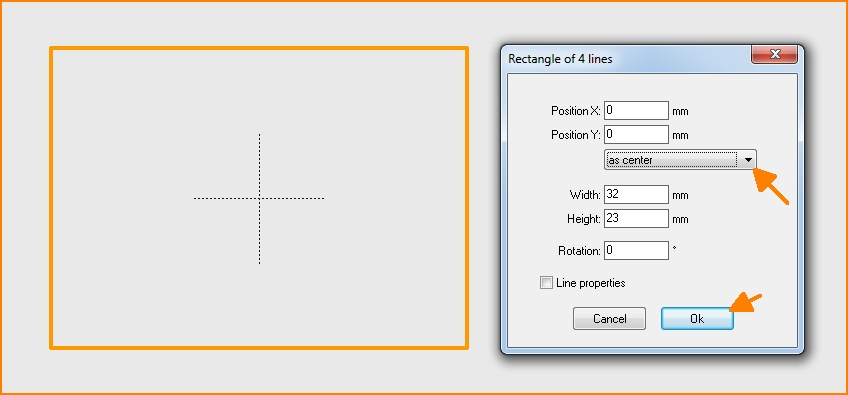
Image: Rectangle with coordinate origin in the center
Move the mouse pointer to the upper left corner of the rectangle and press the [+] key to exactly hit the coordinates of the corner point. Press Return and then press the [g] key to "drag" the corner point inwards. Do not use the mouse for this, but rather the arrow key on the keyboard. So you stay at the same height and move on the grid only to the right. Look at the coordinates in the status bar at the bottom of the window. When you have reached -10|11.5, press Return.
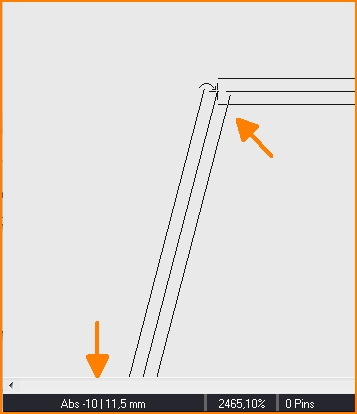
Image: Drag corner inwards
Do the same with the right corner.
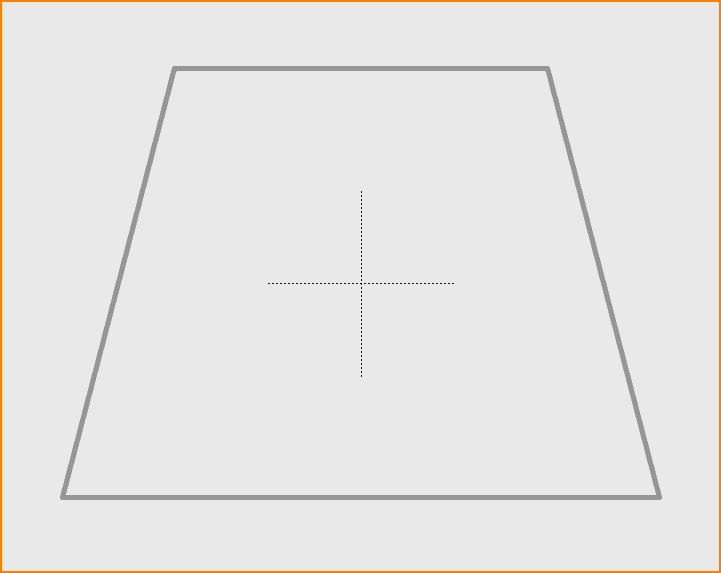
Image: The trapezoid might look like this now.
If necessary, round the corners by selecting a line and right-clicking on one of the black end boxes to open the context menu. Here you have the option "Round corner" and then the dialog for dimensioning the rounding follows.
Now set the two 3.1mm diameter holes to the right and left of the trapezoid. You can either use the "Draw open circles" from the drawing functions or the hole from the sidebar on the left. Any existing sidebar milling pattern can be used as required. The same applies to text, which you should place on layer 30:
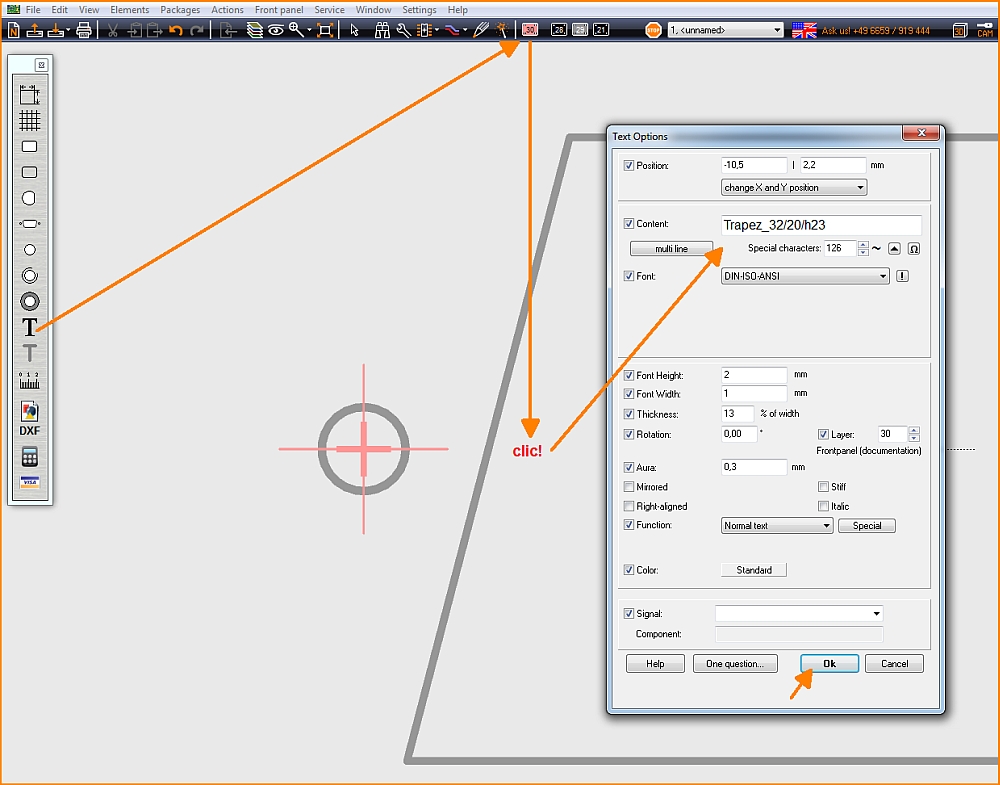
Image: Drills placed, text prepared...
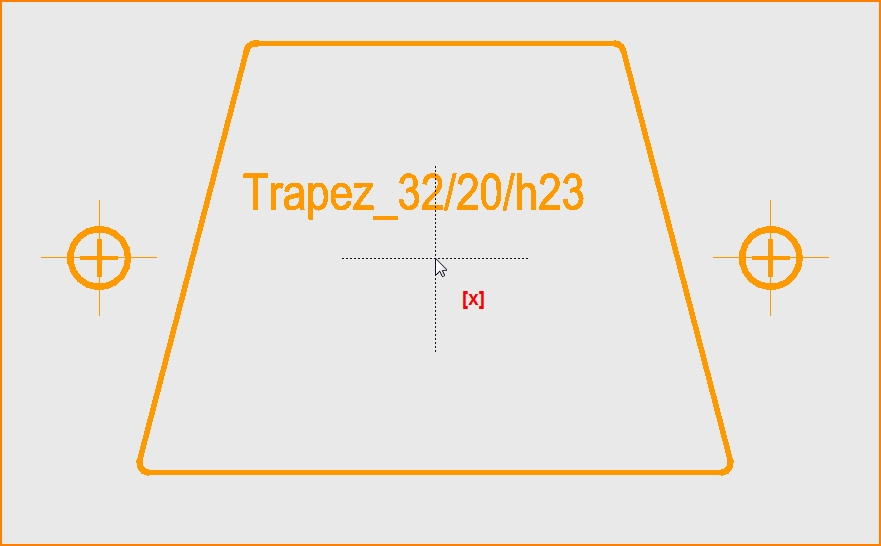
Image: The trapezoid with drills
Highlight the whole drawing and move the mouse to the position where you would like the handle cross to appear, say on the coordinate origin (could be placed elsewhere as well). Press keyboard key [x] to save. Confirm the following dialogs. Select Frontpanel as component type and assign a meaningful name to it. We had choses Trapez_32/20/h23. Now save it. If everything is OK, just close the appearing dialog to do eventual amendments. If you would find a bug, fix it now and save again. Close this dialog since it pops up again. The milling pattern vanishes from the drawing canvas into the component database, where it can be found by its name being component type Frontpanel.now itis ready for use...
