Ultra Librarian: Difference between revisions
No edit summary |
No edit summary |
||
| Line 4: | Line 4: | ||
[[Image:UltraLibrarian_1.jpg|Ultra Librarian]]<br>Image: The | [[Image:UltraLibrarian_1.jpg|Ultra Librarian]]<br>Image: The [https://www.ultralibrarian.com UL opening dialog]. Components can be searched by the name, e.g. ''ATMEGA168PV-10AU'', a microcontroller by Atmel/Microchip.<br><br><br> | ||
[[Image:UltraLibrarian_2.jpg|Ultra Librarian]]<br>Image: Ultra Librarian list of results. First of all, we are interested in the models, which means the CAD data.<br><br><br> | [[Image:UltraLibrarian_2.jpg|Ultra Librarian]]<br>Image: Ultra Librarian list of results. First of all, we are interested in the models, which means the CAD data.<br><br><br> | ||
[[Image:UltraLibrarian_3.jpg|Ultra Librarian]]<br>Image: Available models can be seen in the preview | [[Image:UltraLibrarian_3.jpg|Ultra Librarian]]<br>Image: Available models can be seen in the preview which UL offers.<br><br><br> | ||
[[Image:UltraLibrarian_4.jpg|Ultra Librarian]]<br>Image: | [[Image:UltraLibrarian_4.jpg|Ultra Librarian]]<br>Image: UL offers all three characteristic forms for this component. The views can be varied, see buttons below the images. A click on the Download button opens a dialog to select the CAD tool. In our case it is TARGET 3001!<br><br><br> | ||
[[Image:UltraLibrarian_5.jpg|Ultra Librarian]]<br>Image: | [[Image:UltraLibrarian_5.jpg|Ultra Librarian]]<br>Image: Tick the box at TARGET 3001! for schematic symbol and footprint pattern. Also tick the box to load the step model (3D view).<br><br><br> | ||
[[Image:UltraLibrarian_6.jpg|Ultra Librarian]]<br>Image: Ultra Librarian liefert die Daten im Format CXF sowie STEP. Speichern sie das zip-File in ein beliebiges Verzeichnis.<br><br><br> | [[Image:UltraLibrarian_6.jpg|Ultra Librarian]]<br>Image: Ultra Librarian liefert die Daten im Format CXF sowie STEP. Speichern sie das zip-File in ein beliebiges Verzeichnis.<br><br><br> | ||
Revision as of 14:19, 9 August 2018
Ultra Librarian (UL) is a portal for downloading CAD data of electronic components. This mainly involves the schematic symbol, the soldering foot pattern and a 3D model. These data can be easily integrated into the TARGET 3001! - component database. The following images illustrate the individual steps:
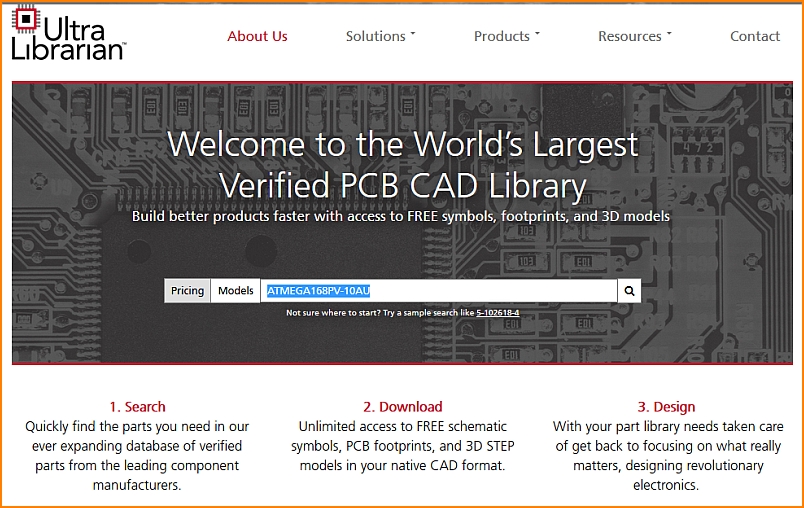
Image: The UL opening dialog. Components can be searched by the name, e.g. ATMEGA168PV-10AU, a microcontroller by Atmel/Microchip.
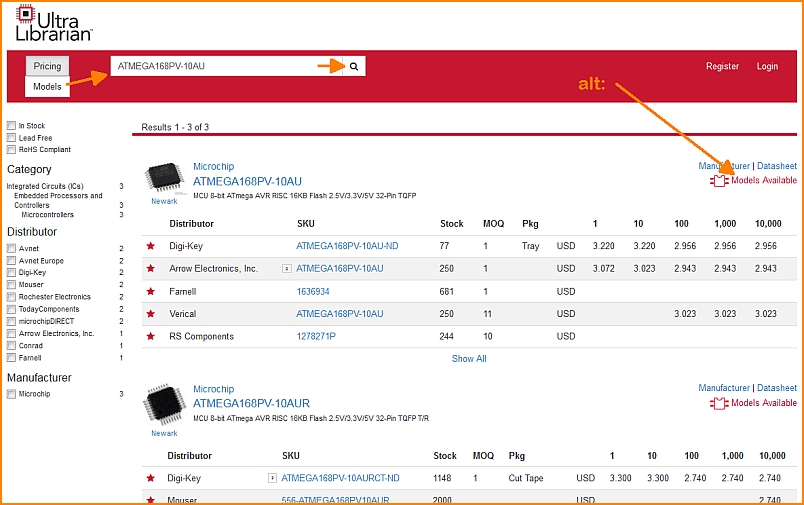
Image: Ultra Librarian list of results. First of all, we are interested in the models, which means the CAD data.
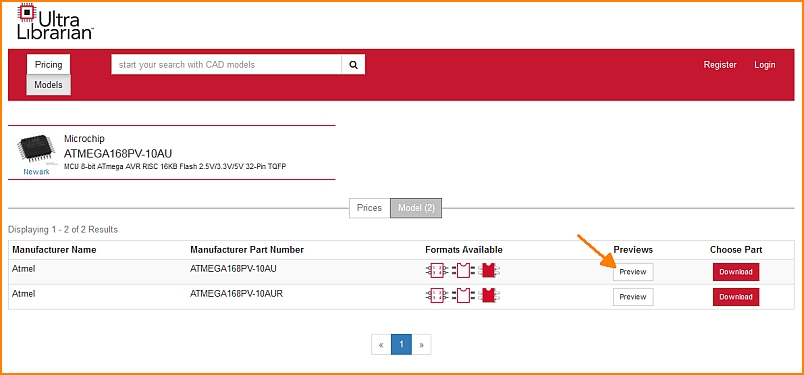
Image: Available models can be seen in the preview which UL offers.
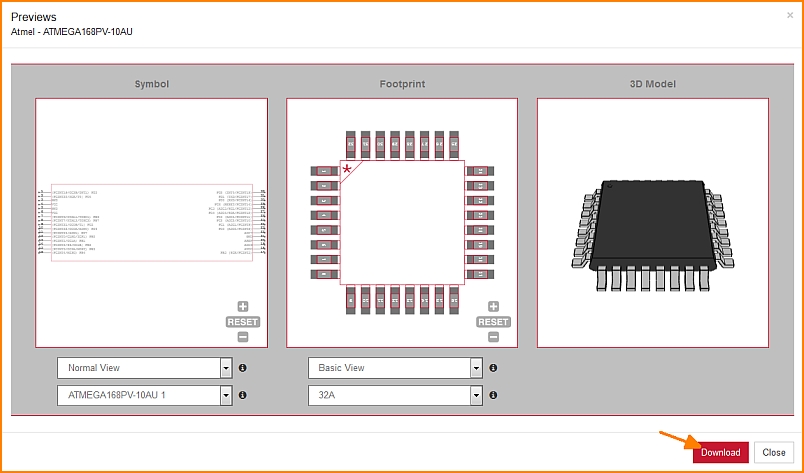
Image: UL offers all three characteristic forms for this component. The views can be varied, see buttons below the images. A click on the Download button opens a dialog to select the CAD tool. In our case it is TARGET 3001!
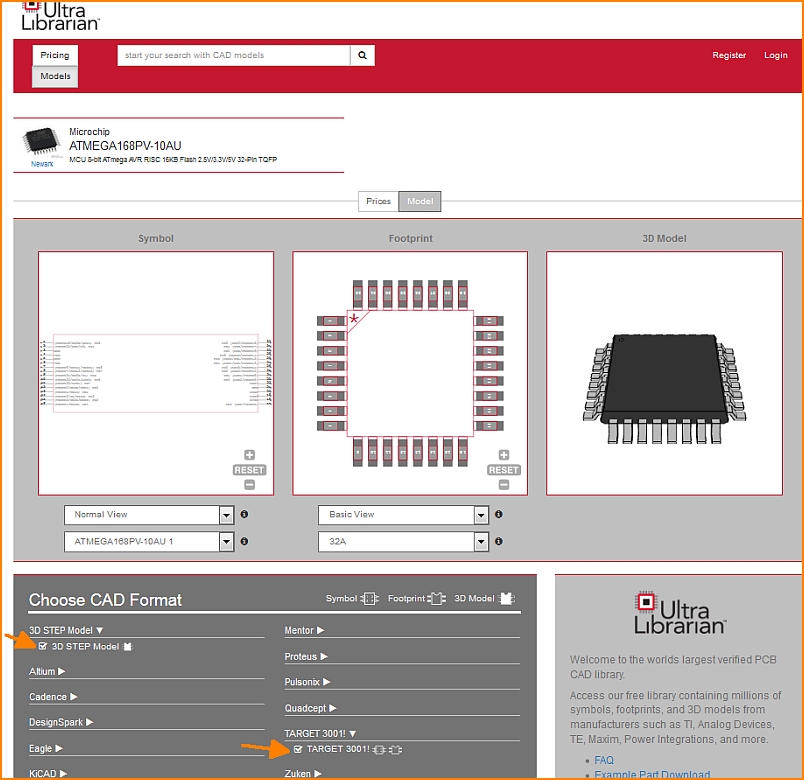
Image: Tick the box at TARGET 3001! for schematic symbol and footprint pattern. Also tick the box to load the step model (3D view).
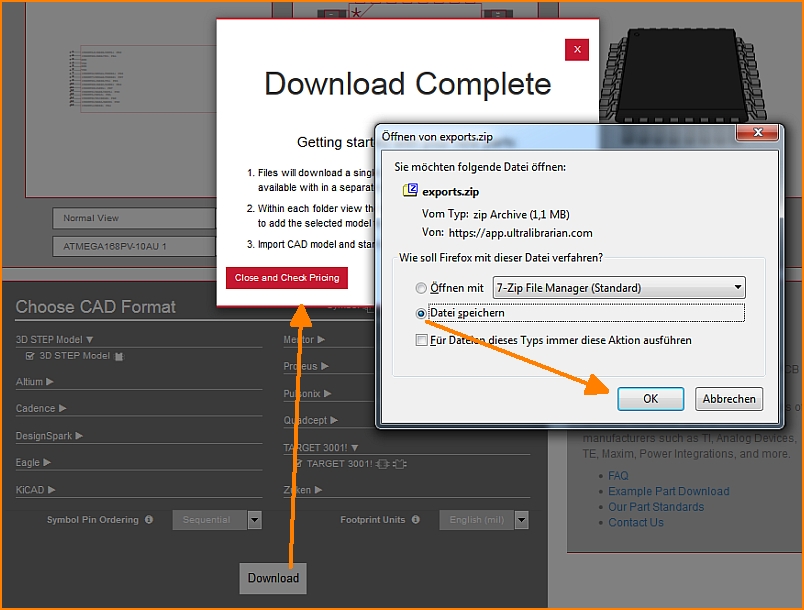
Image: Ultra Librarian liefert die Daten im Format CXF sowie STEP. Speichern sie das zip-File in ein beliebiges Verzeichnis.
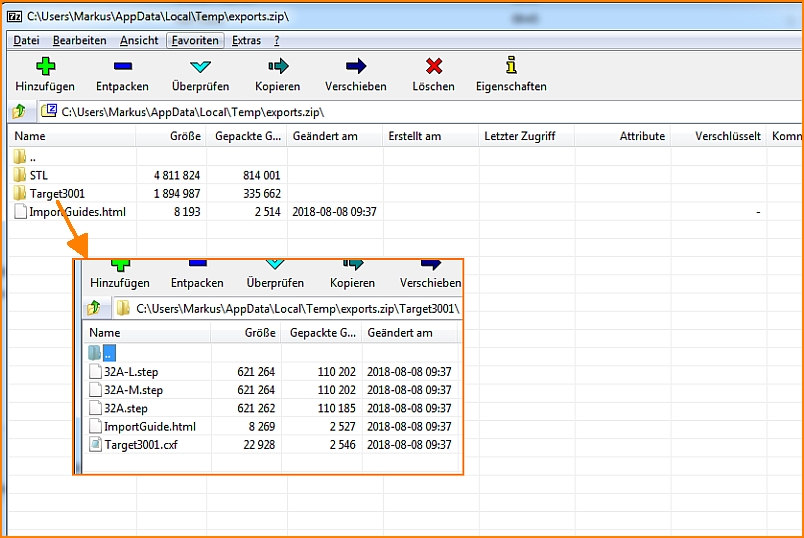
Image: Das zip-File beinhaltet die aufgezeigten Details...
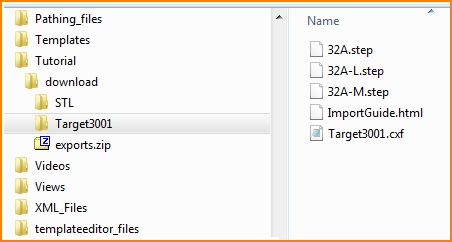
Image: und speichert sie entsprechend in ein Verzeichnis Ihrer Wahl.
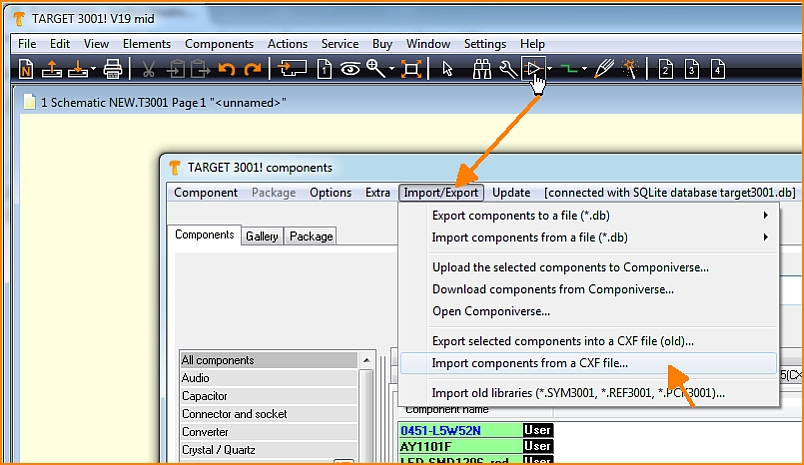
Image: Öffnen Sie nun die Bauteildatenbank in TARGET 3001! und importieren Sie die Daten zunächst als CXF.
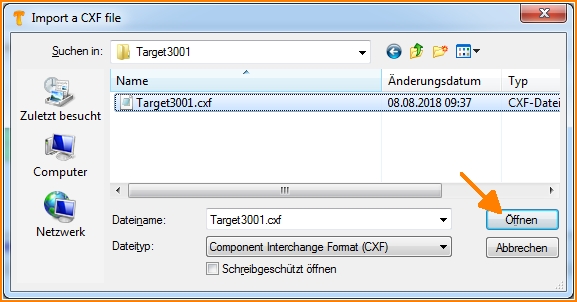
Image: SchaltImage und Lötfüßchenmuster werden durch das Format CXF übertragen.
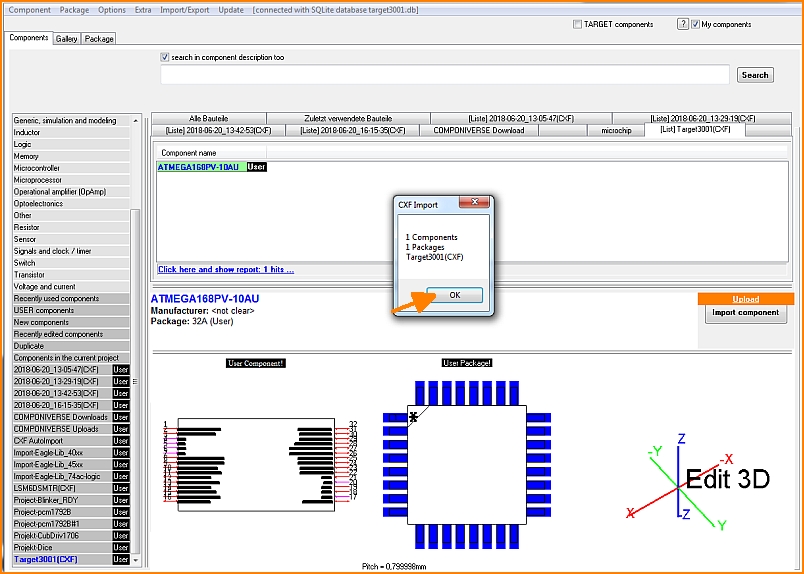
Image: So stellt sich das in TARGET 3001! dar.
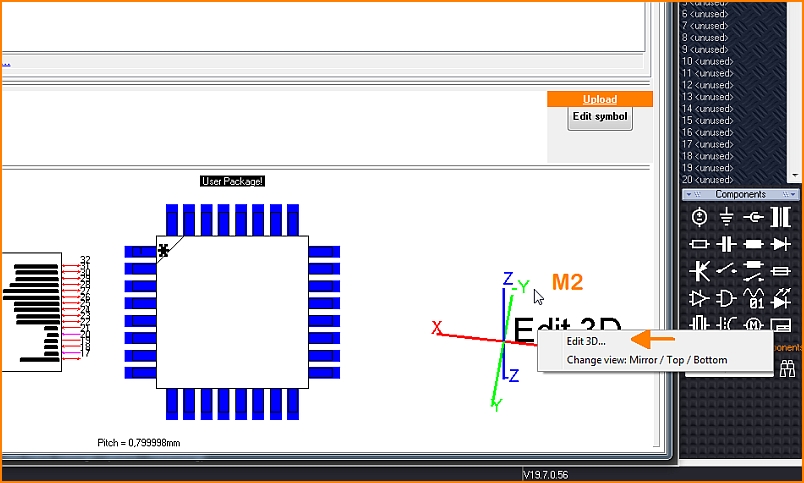
Image: Um für die 3D Darstellung das Step Modell zu importieren, klickt man mit der rechten Maustaste auf das Koordinatensystem und wählt die Option "3D bearbeiten".
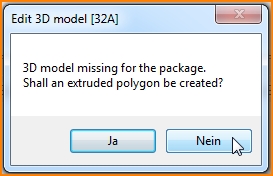
Image: Ein extrudiertes Polygon des Umrisses soll nicht erzeugt werden, denn wir wollen ja ein schönes 3D-Modell importieren. Wir wählen hier also "Nein". Sollte kein Step. File vorhanden sien, ist die Darstellung des Bauteilkörpers als extrudiertes Polygon eine schnelle Alternative. Der Bauteilumriss wird dabei auf Höhe gebracht, so dass eine Quader oder ein Zylinder oder -je nach Umrissform- ein anderer Körper entsteht.
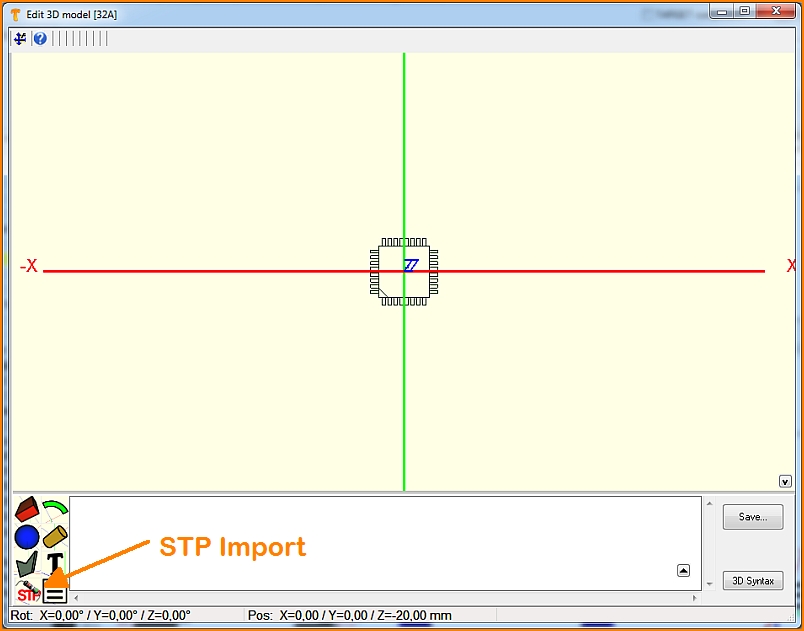
Image: Das landing pattern zeigt die Markierung im Südosten. Pad Nummer 1 wird also auf der horizontalen Reihe im Süden erwartet und zwar an Position links außen. Drücken Sie jetzt den Knopf zum Import einer Step-Datei.
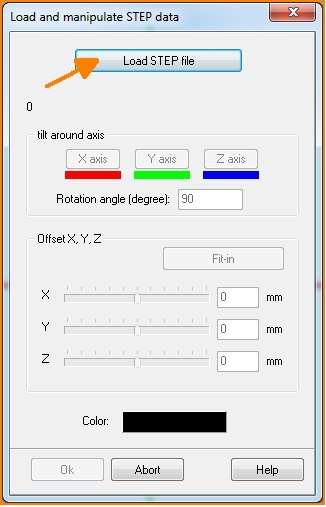
Image: Im sich öffnenden Dialog werden Sie aufgefordert das entsprechende file zu laden. Eventuell ist es erforderlich, das Modell auszurichten, denn nicht immer kommt das Objekt passgenau herein.
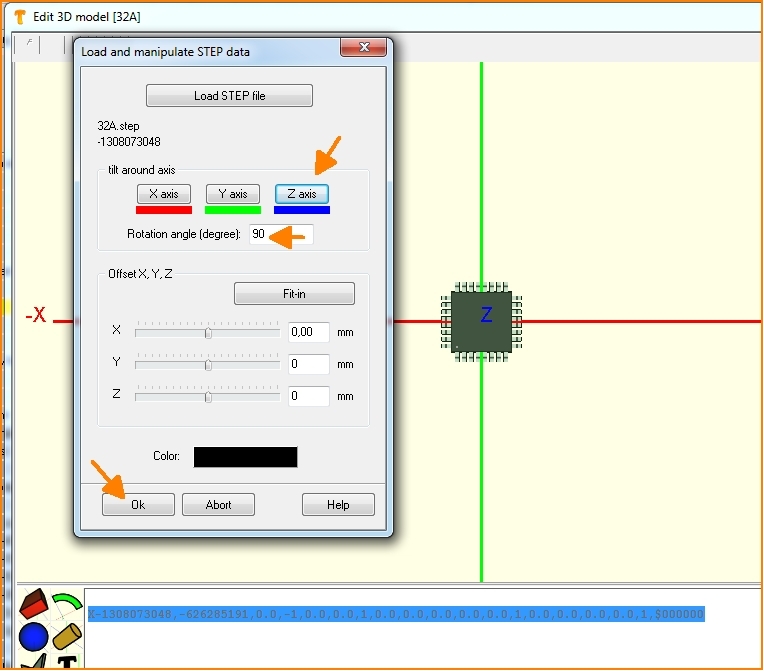
Image: Man kann also die 3D-AbImageung an den Koordinatenachsen drehen, oder verschieben, bis die AbImageung keinen Versatz mehr zeigt.
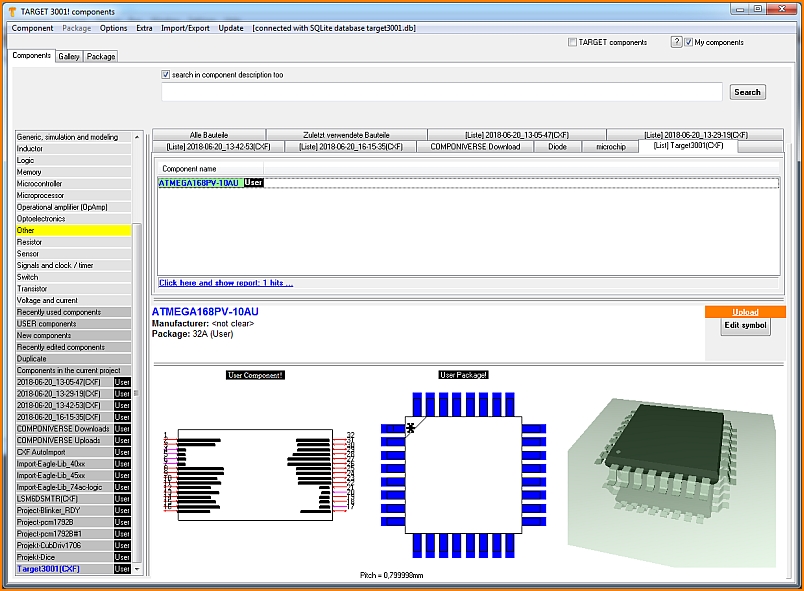
Image: Nach OK, schließen Sie alle Dialoge incl. der Datenbank. Ihr Bauteil befindet sich jetzt in der Datenbank und kann für Designs in TARGET verwendet werden.
en: Ultra Librarian

