Signal classes
Where to find
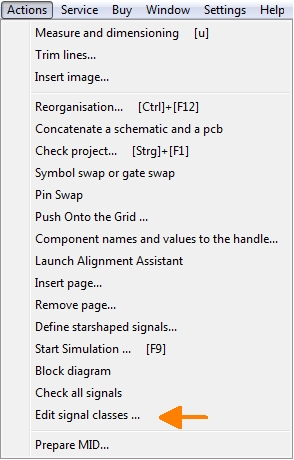
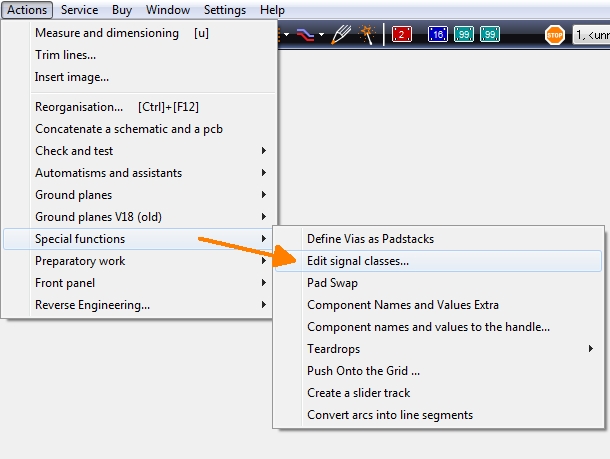
Signals being assigned to a certain class will show the same minimum track width and the same minimum spacing (aura) as designated to this class. Find this option in menu Actions, see images. Also you may find it in menu Settings/Signal classes. The edition of signal classes can be started either from the schematic view or from the layout view. The results will be visible only in the layout view(PCB).
 |
 |
Create a new signal class
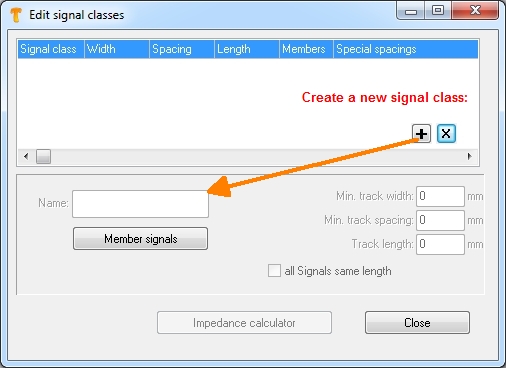
Image: Dialog "Edit signal classes" in default view
In the untouched signal classes dialog (default view) press the plus key to name a new signal class. At the same time you can set values for minimum track width, minimum track spacing and the track length. These settings will be used later when routing the tracks in the layout.
Note: Switch over from imperial scale (mil) to metric scale (mm) by the grid dialog under the "Adjust view" icon = the eye.
As an example we create new signal classes by pressing the plus-key:
- "Data", Minimum width 0,15mm, Minimum spacing 0,2mm
- "Power", Minimum width 1,0mm, Minimum spacing 0,3mm
- "HF", Minimum width 0,2mm, Minimum spacing 0,2mm
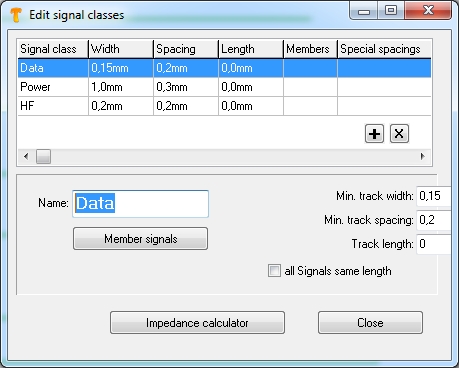
Image: Create a new signal class by click on the plus button. Delete a class using the X.
In the column signal class the names of the various classes are shown. Besides we have the columns Width, Spacing, Length which we have recognized already and partly have entered values to the fields. You can't enter values manually here. TARGET 3001! does it automatically.
Assign one or more signals to a class
In the schematic please highlight those signals (add key [Ctrl] eventually) you like to assign to a signal class. Press keyboard key [e] for edit and the "Change Signal Wires" opens:
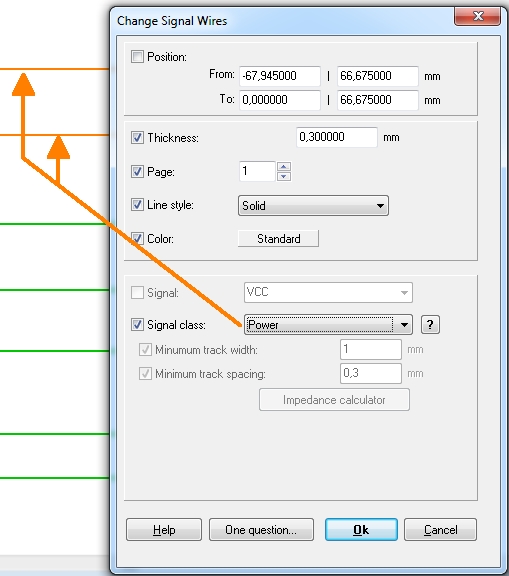
Image: Dialog: "Change Signal Wires"
Now select the desired signal class from the drop down menu and immediately the designated values of minimum width and minimum spacing concerning this signal class appear. The values are greyed out because they are defined by the class settings. At this point they can not be edited. Only if you select the item <No signal class> from the selection of "Signal class" options, the values can be adjusted here.
Back in the dialog "Edit signal classes": The button Member signals shows the signals belonging to a class. Further signals can be added by ticking the box in front of each signal. The option "all remaining" puts all signals which not yet have an assignment to any other class into this class.
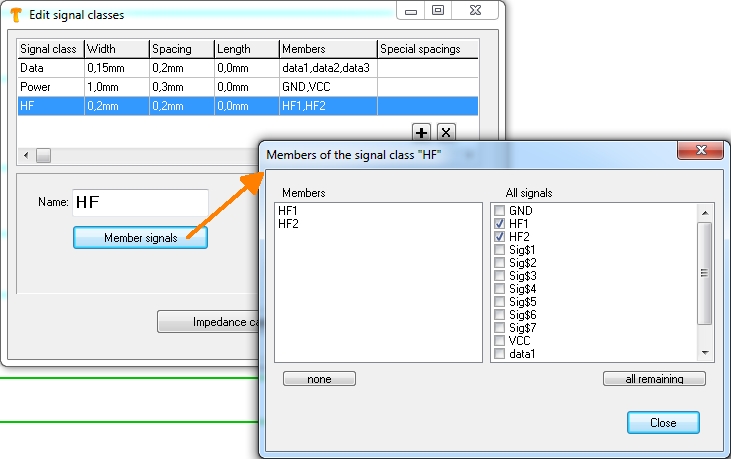
Image: Administrate class members
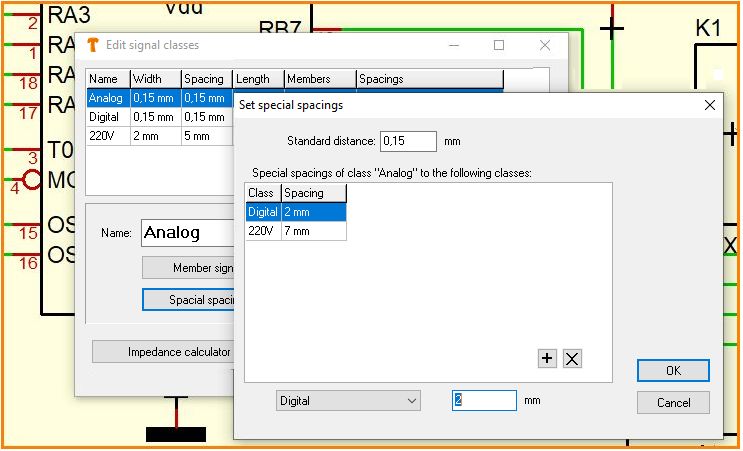
The column Special spacings allows to define signals of a certain class to have a special spacing to the signal as of a particular other class.
Special distances to other signal classes
You can give the signal classes special distances to other classes. Special distances are entered here for the signal class "Analog".
Delete a signal class
You can delete a signal class at any time either by the [Del] key or by the button with the "x" in the dialog, see image 2. The only need is to have the name of the signal class highlighted. The signals of a class deleted keep the assigned values until you change them individually.
Note: You can search for a certain signal class by the use of the binoculars: just enter the name of the class to the search field and immediately see all signals belonging to the class highlighted. Signals of a certain class might be copied and pasted to another schematic page by the clipboard function. The membership to the class is kept.
Delete signal from signal class
If a signal is removed from a signal class, minimum width and length are reset to the default values.
In a project without schematic
The use of signal classes plays an important role in a project without a schematic: Only by assigning certain signals to signal classes the autorouter later can take over information about the track width to be implemented. Also consider the possibility of renaming signals as a whole if TARGET has only assigned artificial signal names. Again use the binoculars to do so. However, this is not crucial for the autorouter's work.
How can I highlight all signals of a certain class?
Using key [f] which stands for "find and select", you can highlight all signal segments or track segments of acertain signal class. See also the identical menu item in the "Edit" menu.
At the top right of the sidebar you can also search for the name of the signal classes in the search line. Click on the binoculars. Also the selection assistant in menu "Edit" offers "signal class" as search criterion, see the Property column.
Questions on this topic??
target@ibfriedrich.com


