Junction / Node
Contents
General
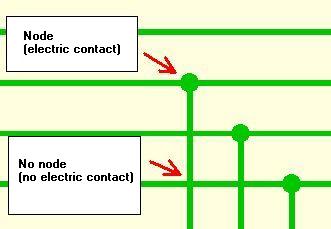
A node is an element of the schematic. It electrically connects intersecting signals which means that by a node two nets are concatenated. One needs to decide for one signal name for both because electrically it is the same signal now.
= You can reach this mode... =
by [.] (=full stop) or
by "Place Junctions" in Menu Elements or
by the tool ![]()
Leave this mode...
by [ESC] or M12
What you can do...
Press [o] for junction/node options. If you place a junction node by M1, TARGET 3001! automatically switches to the mode "Draw Signal". If a connection of two signals results, you are asked if you wish this connection and which new signal name shall be used. Is a new connection established between two different signals, TARGET 3001! asks you, if you accept this connection and which new signal name should be used. After a junction is established, TARGET 3001! switches into the draw signals mode. Press M1 or [o] (for options) in junction mode to select the options of this and future junctions. Set the radius and choose the desired schematic page by M11.
Automatic deletion of nodes
If you connect a signal to another, a node is placed as a sign for connection. If you delete this branch, the node itself is automatically deleted too, as far as it is obsolete.
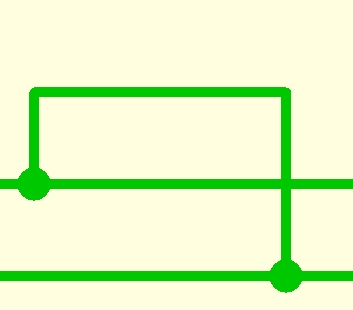
Image: Signal branch connected by nodes.

Image: Signalsegment highlighted. Now press the [Del] key.
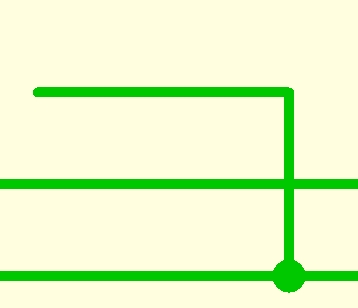
Image: Signalsegment as well as node are deleted.
![]()
Image: If a complete signal branch including it's nodes shall be deleted, use the icon shown above in order to highlight it completely.

Image: Signal branch with nodes highlighted. Now press the [Del] key.
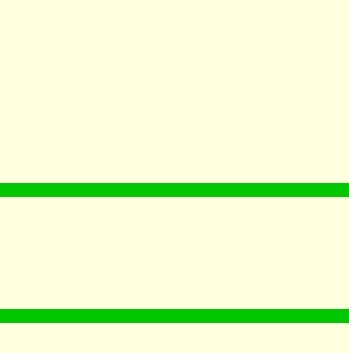
Image: Signal branch with nodes deleted.
How to preset junction size for coming junctions
See menu "Settings/Settings (Project)"...
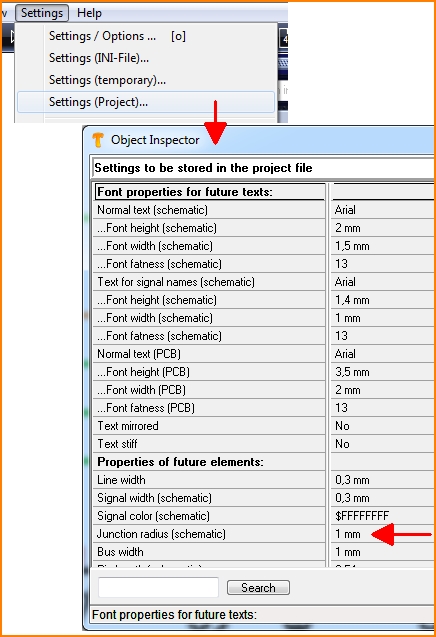
Image: Click upon the entry at Junction radius (schematic), here: "1mm", for setting a different value.
How to edit all junctions used in a design on one strike afterwards
Highlight your complete schematic drawing and press keyboard key [e] for edition. Tick "Junctions" and press OK in order to enter to the flashing dialog.
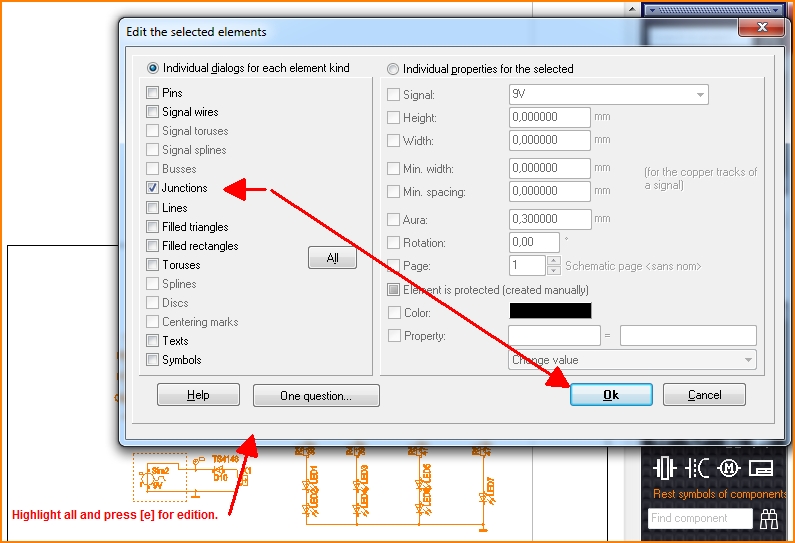
Image: How to open the dialog allowing to edit all junctions in the schematic on one strike. The coming dialog itself is self explanatory.
Alternatively consider to select them all by the Selection assistant use of menu Edit/Selection assistant... In this dialog please set:
Element type|equal to|Junction and press Start. Now all junctions (= nodes) are highlighted. Now press [e] to edit them.


